-
From the Projects
or Data Servers area, double-click a synonym from the Master
Files folder, or right-click the synonym and select Edit
in Synonym Editor.
The Synonym Editor opens.
-
Right-click a segment or field, select Insert, and
click Filter.
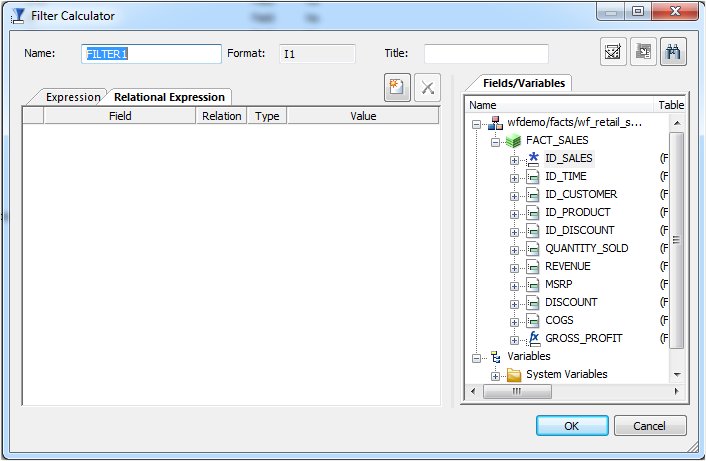
The Filter Calculator opens, as shown in the following image.
-
From
the Filter Calculator, type a name for the filter in the Name input field
or use the default filter name.
Note: It is recommended that filters have a descriptive name to help identify the filter action during reporting.
-
The
Format field shows a default value of I1.
Note: The Format field cannot be changed. Values for filters return 0 for false and 1 for true.
-
You
may enter a descriptive title for the filter in the Title input field.
Tip: From the Properties Pane in the Synonym Editor, click the browse (...) button at the right of the TITLE and DESCRIPTION value fields to specify multiple language titles.
-
Use
the Expression tab and the calculator buttons to build the expression
for the filter.
or
Use the Relational Expression tab to build the expression.
-
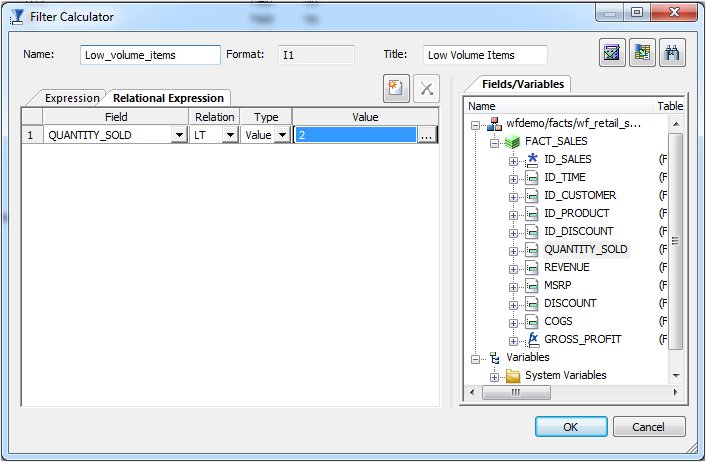
From the Relational Expression tab, click the Add
New Row
 button
and use the drop-down lists to select the filter Column, Relation,
and Type.
button
and use the drop-down lists to select the filter Column, Relation,
and Type.
Note: Parameters are not supported with Master File Filters.
-
Click the browse (...) button at the
right of the Value input field.

The Value Selection dialog box opens, as shown in the following image.
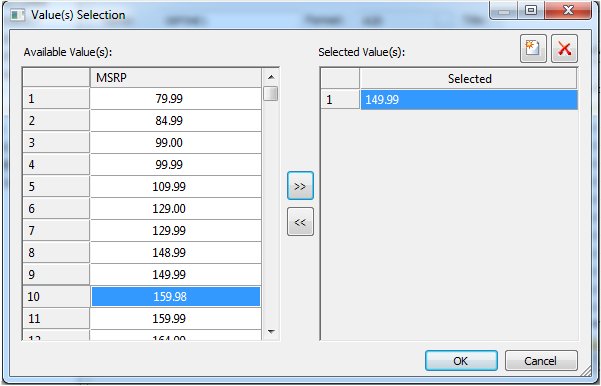
- Select from the available values and use the arrows to add or remove values.
-
Click OK to close the Value Selection dialog
box and return to the Relational Expression tab.
The expression is added to the value field.
-
To add another filter, double-click a column or variable from
the Fields/Variables section on the right side of the Filter Calculator.
The filter is added to the Relational Expression tab where you can add the expression value.
-
To delete an expression, select the number or field column
of the expression and click the Delete button,
or right-click it and select Delete selected row(s).
The expression is removed from the Relational Expression tab.
-
From the Relational Expression tab, click the Add
New Row
- You may click the Check expression and Sample Data buttons, located on the top right of the Filter Calculator to verify that the expression is valid and to view sample data for the filter.
-
Click OK to
close the Filter Calculator and return to the Synonym Editor.
Note: To edit the Filter, Title, or Expression, you may do so directly from the Properties Pane in the Synonym Editor or you may click the browse (...) button at the right of the EXPRESSION value field to relaunch the Filter Calculator.
-
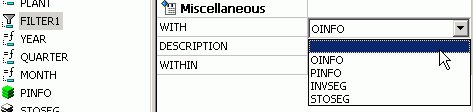
To create a Filter without segment
association, use the WITH drop-down list to select a blank segment.
Filters are created under a specific segment and by default they have association with the selected segment. Filters can also be created without segment association.
Note: If you are using a field that appears in multiple segments, the WITH segment associated should be the lowest level segment or it should be left empty to prevent errors.
In addition, if no fields from the synonym are used in the expression or have not been computed, you can use the WITH option to identify the logical home of the filter calculation. You can also use the WITH option to move the logical home for the filter field to a lower segment than it would otherwise be assigned (for example, to count instances in a lower segment).
-
Click Save from
the File menu to save the synonym.
The filter is saved as part of the synonym.
- To close the Synonym Editor, select Close from the File menu or click the control button in the upper-right corner.