This section explains how to create the WebFOCUS Repository
and verify the WebFOCUS Client configuration.
xWebFOCUS Repository Table Creation
This section explains how to create
the WebFOCUS Repository.
Caution:
- If you specified
an existing repository during the Distribution Server installation,
this utility will erase all of its data. If you wish to preserve
this information, run the extract utility, as explained in the Migration manual.
- This utility drops,
creates, and/or updates tables using the connection information you
specified during the installation. To change this information, see ReportCaster Configuration.
x
Procedure: How to Create the WebFOCUS Repository Tables
To create
the Repository tables:
-
Ensure that the database server
is available and/or started.
-
From qshell, navigate to the following WebFOCUS Utility directory:
/installation_directory/ibi/WebFOCUS80/Utilities/WFReposUtil
-
Execute the following command:
sh WFReposUtilCMDLine.sh
The
following prompt is displayed:
Please select mode option for WFReposUtil:
1\) create             - create non-existing tables
2\) insert             - insert data into tables.
3\) create_insert      - combo of above
4\) update             - update table data
5\) drop               - drop tables
6\) drop_create        - drops and recreates tables
7\) drop_create_insert - drop, create, and insert
8\) extract            - export database data to xml files
9\) create_ddl         - generate SQL scripts but not execute them
Q\) To Quit
    Enter selection (default:3):
-
Select the default option and press Enter.
If you are installing WebFOCUS for the first time, select
option 3. This will load initial values into the WebFOCUS Repository,
which are required to begin using the product. This is the default
value.
If you want to begin using WebFOCUS and do not want
to migrate from a previous version, but your repository contains
data that is no longer required and can be discarded, select option
7.
Alert: Selecting option 7 will delete all existing
repository content.
The other options typically apply when
you intend to migrate from another WebFOCUS release. For more information,
see the WebFOCUS Migration Guide.
Note: If
you intend to use WebFOCUS, but will not migrate from a previous
version, you must choose an option that will load initial values
into the WebFOCUS Repository.
-
You are prompted to choose a logging level for the utility
Please select logging level option for WFReposUtil:
1) off
2) severe
3) warning
4) info
5) config
6) fine
7) finer
8) finest
Q) To Quit
If selected, the log file named WFReposUtilCmdLine.log
will be created in the following directory:
/installation_directory/ibi/WebFOCUS80/Utilities/WFReposUtil
This
utility uses the connection and logon information provided during
the installation of WebFOCUS. The utility creates .sql files that
contain the instructions.
Note:
- If the utility
cannot connect to the database, ensure that the proper path to the
JDBC driver appears in the following CLASSPATH value:
/installation_directory/ibi/WebFOCUS80/ReportCaster/bin/classpath
- If the WebFOCUS installation program installed and configured
Derby, this driver may be located as follows:
/installation_directory/ibi/derby/lib/derbyclient.jar
If
you are using a DB2 repository, then an appropriate driver may be
located as follows:
/QIBM/ProdData/HTTP/Public/jt400/lib/jt400.jar
Consult
your database documentation for additional information.
- If you can connect to the database, but cannot create tables,
ensure the ID you entered for the database during the WebFOCUS installation
has create permissions. You can change this user ID, as explained
in WebFOCUS Client Verification and Configuration.
x
Importing and Exporting the ReportCaster Configuration File
The ReportCaster configuration file (dserver.xml) is
placed in a WebFOCUS repository table during installation. Changes
to this file can be made using the ReportCaster Configuration tool
and the WebFOCUS Administration Console. You can export the dserver.xml
file from the WebFOCUS repository to your file system or import
the dserver.xml file from your file system to the WebFOCUS repository.
To export the dserver.xml file to your file system, run the exportcfg utility,
which is located in the following directory:
ibi/WebFOCUS80/ReportCaster/bin
The dserver.xml file will be exported to the following directory:
ibi/WebFOCUS80/ReportCaster/cfg
To import the dserver.xml file from your file system, copy the
dserver.xml file to the following directory:
ibi/WebFOCUS80/ReportCaster/cfg
Run the importcfg utility, which is located in the following
directory:
ibi/WebFOCUS80/ReportCaster/bin
xReportCaster Verification
After the repository is created, you should test the
WebFOCUS Client and the ReportCaster configuration.
If you have problems with the verification, see Troubleshooting WebFOCUS and ReportCaster.
Make sure you have carried out the procedures in the preceding
chapters before starting the Distribution Server.
Before starting or testing the Distribution Server, components
it communicates with must be started. These include the following:
- Web server
- Application server where the
WebFOCUS web application is deployed
- WebFOCUS Reporting
Server
- Database Server containing
WebFOCUS Repository tables
- Mail Server
- FTP Server (if using
FTP)
x
Testing the WebFOCUS Client
This section describes how to test the WebFOCUS Client.
x
Procedure: How to Test the WebFOCUS Client
-
Ensure
the web and/or application servers are started and configured.
-
Go to the following page using
a browser:
http://hostname:port/ibi_apps/
where:
- hostname:port
Are the host name and HTTP port of the web server or application
server. If you
require SSL, use https instead of http.
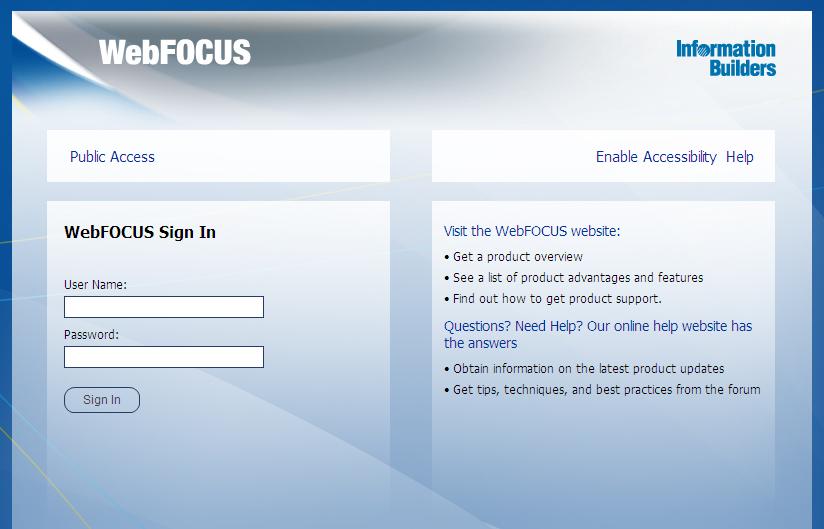
The WebFOCUS Sign In page opens,
as shown in the following image.
Note: If you
receive a page not found error, ensure that your application
server is started and that you have deployed the WebFOCUS application.
For more information on configuring your application server, see Installing the WebFOCUS Client.
-
Enter the following default credentials:
- User Name: admin
- Password: admin
Note: If you receive
an invalid user name or password error, ensure that the WebFOCUS
repository has been created and contains initial table data.
-
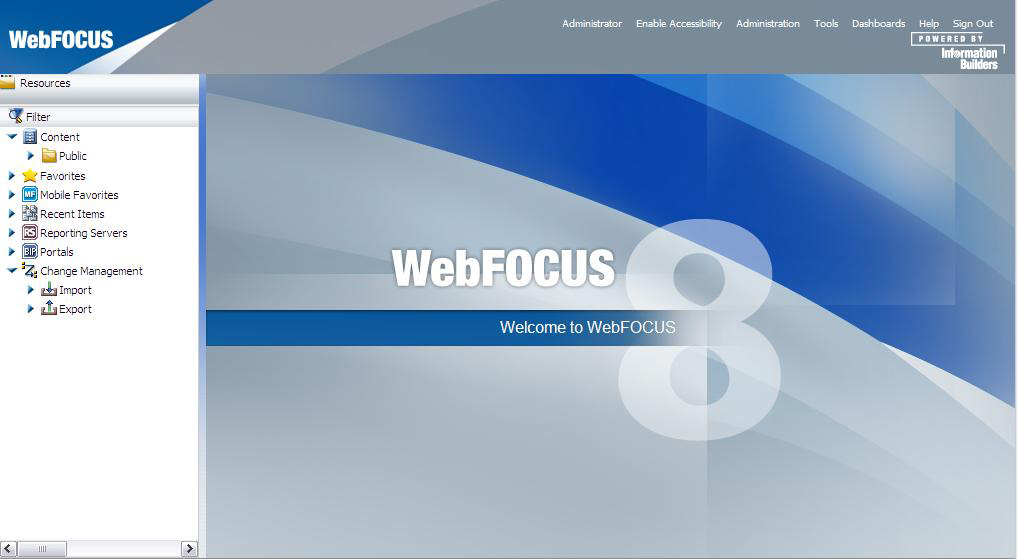
Click Sign In.
The WF BI Portal page displays, as shown in the following
image.
You can change the
default credentials using the Security Center facility. Click Administration from
the top menu, and then Security Center. For
more information, see the WebFOCUS Security and Administration manual.
x
Testing, Starting, and Stopping the ReportCaster Distribution Server
This section describes how to test, start, and stop
the ReportCaster Distribution Server.
x
Procedure: How to Test the Distribution Server Configuration
To test
the Distribution Server configuration, use the following procedure:
-
Navigate
to the following directory:
/install_directory/ibi/WebFOCUS80/ReportCaster/bin
-
Type the
following command and press Enter:
./testcfg
The
format of the configuration information, the connection to the repository,
and the repository structure are tested. If the configuration is
correct, you receive the following message:
WebFOCUS Repository Release Validation:
WebFOCUS Repository tables confirmed to be at the 80 release
level.
test is successful
If you
receive an error, ensure the database server for your repository
is started and the CLASSPATH contains the JDBC driver in:
/install_directory/ibi/WebFOCUS80/ReportCaster/bin/classpath
Also
ensure that you are using a WebFOCUS 8.0 repository and the correct
user ID and password. If you need to correct the user name and password
for accessing the repository or other connection information, see ReportCaster Configuration.
x
Procedure: How to Start the Distribution Server From the OMVS Shell
To start the Distribution Server,
use the following procedure:
-
Navigate to the following directory:
/install_directory/ibi/WebFOCUS80/ReportCaster/bin
-
Type the
following command and press Enter:
./schbkr &
When the Distribution Server starts,
you receive output similar to the following, depending on which
components you installed:
Console is listening on port: 8200
Reader ready
Dispatcher ready
Console ready
When the
Console Ready line appears, the Distribution Server is started.
Note: The Distribution Server
will start in Console mode if it cannot connect to the repository,
or if your repository is for an earlier release. ReportCaster must
use a valid 8.0 Repository.
x
Procedure: How to Stop the Distribution Server
To stop the Distribution Server, do
the following:
-
Navigate to the following directory:
/install_directory/ibi/WebFOCUS80/ReportCaster/bin
-
Type the
following command and press Enter:
./stopit
-
Wait a few minutes. It may take some time for the Distribution
Server to stop. Then, issue the following to confirm the Distribution
Server has stopped:
netstat -a | grep 8200
where:
- 8200
Is the port for the Distribution Server.
If
you receive a response that says LISTEN:
tcp 0 0 *:8200 *:* LISTEN
Then
the Distribution Server has not yet stopped. Wait a few minutes
and try again. If it still has not stopped, you can manually kill
the process. To do this, log on as root and issue
netstat -nlp | grep 8200
Then,
kill the process that appears at the end of the line.
x
Procedure: How to Start the Distribution Server for Production
When running the Distribution Server
in production, you should start it using the nohup command. This
ensures that the Distribution Server remains running if you close
telnet or SSH sessions. To do this:
-
Navigate
to the following directory:
/install_directory/ibi/WebFOCUS80/ReportCaster/bin
-
Type the
following command and press Enter:
nohup ./schbkr &
Output
is written to an nohup.out file.
x
After the ReportCaster Distribution Server is started,
test the ReportCaster configuration by accessing ReportCaster interfaces.
x
Procedure: How to Verify ReportCaster Distribution Server Startup
-
Start the
ReportCaster Distribution Server and all related components, if
they are not started.
-
Log in to
the WebFOCUS Business Intelligence (BI) Portal.
-
Click Sign
In from the top menu.
The Sign in to WebFOCUS dialog opens.
-
Enter a valid user name and password, and click Sign In.
-
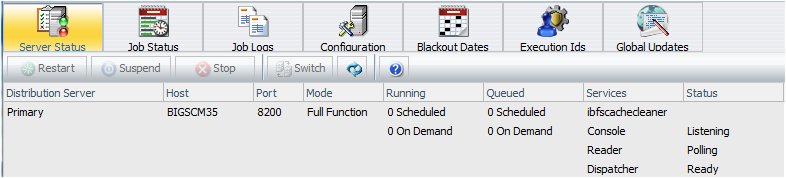
Click Tools from
the top menu and select ReportCaster Console.
The ReportCaster console page opens, as shown in the following image.
If
the page does not appear, ensure your web and/or application servers
are running. Ensure the ReportCaster web application has been deployed
to your application server. If applicable, ensure your web server
can route requests to the application server.
If you receive the following errors:
-
Unable to communicate with the Distribution Server to obtain
configuration information. Please confirm that the Distribution Server
is started and that the values of the Distribution Server server
host and port are correct.
Ensure the Distribution
Server is started and your application server CLASSPATH includes
the JDBC driver for your repository.
The full path of the
JDBC driver file or files, including the file name, must be in CLASSPATH.
The directory containing the driver file or files is not sufficient.
If you change the CLASSPATH variable, you must restart the application
server.
-
ReportCaster cannot communicate with the WebFOCUS Repository.
Check that the Application Server is properly configured with the
correct JDBC driver.
Both the distribution server
and the application server need to communicate with the WebFOCUS
repository. Check that the application server is configured to use
the WebFOCUS repository JDBC driver.
-
Click the Configuration tab
to access the ReportCaster Server Configuration tool.
The ReportCaster Server Configuration interface appears.
Changes
made to the configuration may not take effect until you restart
the Distribution Server and application server.
When this interface opens, it ensures that
ReportCaster web components can communicate with the Distribution
Server. If you receive a connection error, see ReportCaster Troubleshooting Tips.
-
Select the Security
Settings folder.
-
Click the Administrator button
to the right of the Administrator Settings folder.
-
Provide
and confirm a password for the admin user ID and click OK.
ReportCaster user IDs are normally stored in the WebFOCUS Repository.
However, for security reasons, the Administrator user is controlled
from this interface and not stored in the repository.
Note: If your web server requires HTTPS and you
use Report Library, you must update URLs using the ReportCaster
Server Configuration interface. For Report Library, select the Report
Library folder and modify the Default Library
URL for Email Notification setting to use HTTPS instead
of HTTP.
-
Click Save and
then click OK.
A message appears telling you to restart ReportCaster for
the changes to take effect.
-
Click OK.
-
Click the Restart button
on the toolbar to restart ReportCaster.
-
Optionally,
instead of using the Restart button, stop
the Distribution Server and then restart it to ensure your new password
or any other configuration changes take effect. Also, restart the
application server.
xReportCaster Configuration
ReportCaster configuration parameters are managed within
the ReportCaster Console Configuration tab. For additional
ReportCaster configuration information, see the ReportCaster manual.
x
Changing Configuration Parameters With Scripts
Several scripts allow you to change Distribution Server
configuration settings. The Distribution Server cannot start unless
it can connect to the repository. If you cannot start the Distribution
Server, use these scripts to correct connection settings. The scripts
are installed in:
/install_directory/ibi/WebFOCUS80/ReportCaster/bin
The following scripts are available:
Script | Purpose |
|---|
dbname | Changes the DB Name parameter. This parameter
is only needed when using a DB2 repository on
z/OS.. |
dbpass | Changes the password used to access the
repository. |
dbuser | Changes the user ID used to access the repository. |
repclass | Changes the JDBC class used to access the
repository driver. See Additional WebFOCUS Repository Topics and Tasks for information on this
value. |
repurl | Changes the JDBC URL used to access the
repository. See Additional WebFOCUS Repository Topics and Tasks for information on this
value. |
To run a script, execute it at a shell prompt
with the first argument being the value you wish to set.
Warning: If a value contains a semicolon, you must place
that value between quotation marks.
Example: Running Configuration Scripts
If
during the installation you typed the wrong user ID and password
to access the repository, you can change them as follows.
- Navigate to the
following directory:
/install_directory/ibi/WebFOCUS80/ReportCaster/bin
- Execute the following
to change the user ID used to access the repository:
./dbuser userID
where:
- userID
Is the correct user ID to access the repository.
- Execute the following
to change the password used to access the repository:
./dbpass password
where:
- password
Is the correct password to access the repository.
The
other scripts (for example, repurl, repclass) are executed in the
same fashion. If your URL or CLASS contains a semicolon, place the
URL or CLASS between quotation marks when running the scripts.
x
Configuring the Memory Available for the ReportCaster Log Report
The size of the ReportCaster log report is limited by
the amount of memory available to the Java VM. When the memory of
the Java VM is exceeded, a Java OutOfMemoryException error occurs.
To control the size of the log report,
you can set the following ReportCaster Server Configuration tool
parameters:
- In the Distribution
Servers folder, Max Messages per Task from
Data Server limits the number of messages written to
the log file. The default value is 1000.
- In the Log
Settings folder, Log Purge Period designates
the number of days in which the logs will be purged. The default
value is every 30 days.
x
Configuring the Heap Size for the ReportCaster Distribution Server
If the ReportCaster Distribution Server experiences
a Java out of memory error, you must increase the amount of memory
(heap size) available to Java on the Distribution Server. This is
done by passing parameters on the Java command line, as follows:
java -Xms<initial heap size> -Xmx<maximum heap size>
For example,
java -Xms256m -Xmx512m
You must restart the Distribution Server to enable this change.
x
Configuring ReportCaster Failover and Workload Distribution
The Distribution Server Failover feature allows you
to configure a backup Distribution Server that can resume ReportCaster
operations when there is an interruption (planned or unplanned)
in the primary Distribution Server service. The primary Distribution Server
is monitored to verify it is operational. If there is an interruption
in service, the failover Distribution Server is triggered to take
over the role of the primary server.
The Workload Distribution feature allows ReportCaster to distribute
scheduled jobs across multiple Distribution Servers, providing an
efficient and fast way to process large numbers of ReportCaster
schedules. Multiple Distribution Servers can be installed on one or
more hosts. One instance is designated as the Workload Manager,
while the other are designated as Workers. The WebFOCUS Repository
will be shared by the Workload Manager and the Workers. Workload
Distribution is set up through the ReportCaster Configuration tool.
All servers will share one set of configuration information, and
the Workload Manager will push any configuration changes to the
Workers.
For your application of ReportCaster, you can configure either
or both Failover and Workload Distribution. The following procedure
includes instructions to configure both, but notes when to skip
to the appropriate steps if you are only configuring one or the other.
x
Procedure: How to Configure Distribution Server Failover
To configure
distribution server failover:
-
Open the
ReportCaster Console and click Configuration in
the top pane.
-
Click the Distribution Servers folder
in the left pane.
-
Click the
button to the right of the Secondary Distribution Server field.
The Secondary Distribution Server dialog box opens, as
shown in the following image.

-
Select the Enabled check
box.
-
Enter the hostname and port number of the Secondary server.
-
Click OK.
-
Click Save and
then OK when you are prompted to save.
-
Install
the Distribution Server on the specified host with the specified port
number for that host.
x
Procedure: How to Configure Workload Distribution
To
configure workload distribution:
-
Open the ReportCaster Console and click Configuration in
the top pane.
-
Click the Distribution
Servers folder in the left pane.
-
Click the
button to the right of the Workload Distribution field.
The Workload Distribution dialog box opens, as shown in
the following image.
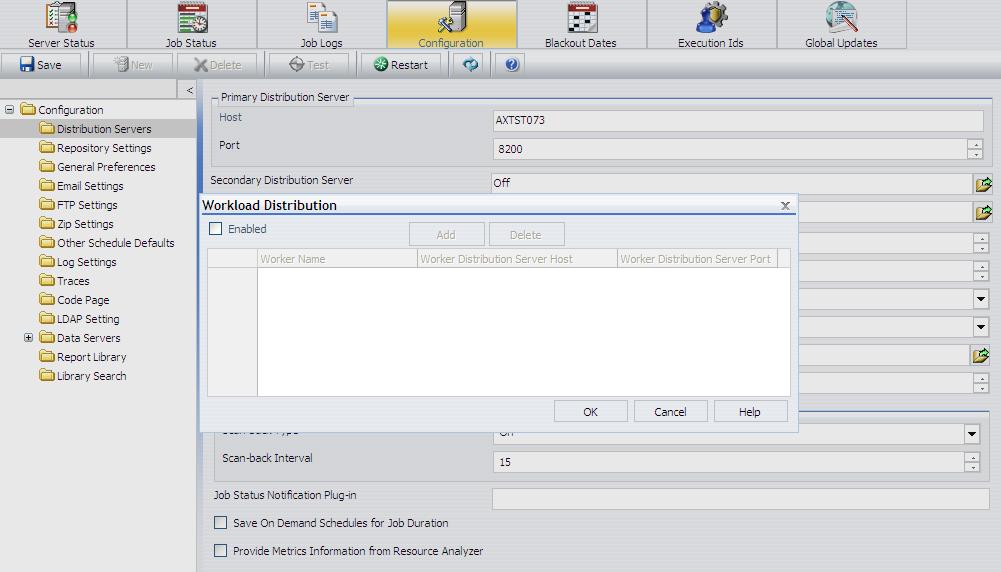
-
Select the Enabled check
box.
-
Click Add.
-
Enter the
name, hostname, and port number of the Worker Distribution Server.
Repeat this step for each Worker Distribution Server instance
that you want to add.
-
Click OK.
-
Click Save and
then OK when you are prompted to save.
-
Install
the Distribution Server on each of the specified hosts with the specified
port number for that host.
x
Changing the Custom Template for the Scheduling Tool
The SchedulePreferences.xml file contains the Custom
and Standard template information as well as template information
for the Schedule button feature available in Developer Studio.
- Locate the SchedulePreferences.xml
file in the \ibi\WebFOCUS80\config\caster directory. On UNIX, this
directory is /ibi/WebFOCUS80/Config/caster.
- Make a copy of the file for backup purposes before you begin.
- Open the SchedulePreferences.xml
file in a text editor. The Custom template consists of the information
under the SchedulePreference element containing the <id>Custom<id>
tag. When changing the scheduling options associated with the Custom
template, modify only the information associated with this element.
This is the SchedulePreference element for the Custom template:
<SchedulePreference __cn="ibi.broker.api.data.preference.schedule.SchedulePreference">
   <id>Custom</id>
   <name></name>
   <description></description>
.
.
.
</SchedulePreference>
Important: Do not
modify the information in the SchedulePreference element containing
the <id>Standard<id> tag
<SchedulePreference __cn="ibi.broker.api.data.preference.schedule.SchedulePreference">
   <id>Standard</id>
.
.
.
</SchedulePreference>
The Custom template lists
all available distribution methods, report output formats, task
types, scheduling intervals, notification options, and some other properties
of a schedule. By removing an entry from the Custom template, an administrator
can limit the scheduling options available to the user of the scheduling tool.
Note
that some options may already be limited by the global settings
in the ReportCaster configuration tool. Therefore, even if an entry
is not removed from the Custom template, the option controlled by
that entry may not be available in the scheduling tool.
- After you have finished
editing the SchedulePreference.xml file, save your changes and restart
the application server. When the Custom template is applied to the scheduling
tool, the options available will reflect the changes made to the
Custom template.
Note:
- The Custom template
is not applied by default.
- For information on
enabling the Custom template in Dashboard, see the Managed
Reporting manual.
- You can also apply
the Custom template when the scheduling tool is used outside the
Dashboard. For more information, see the WebFOCUS Security and
Administration manual.
See the following examples for ways to modify the Custom template.
Example: Limiting the Available Formats
In
this example, only EXL07, EXL2K, HTML, and PDF will display as
available report output formats in the scheduling tool. Other formats
(<formatItem>) have been deleted from the Custom template.
<taskPreference __cn="ibi.broker.api.data.preference.schedule.TaskPreference">
   <show>true</show>
   <collapsed>false</collapsed>
   <formatItem>EXL07</formatItem>
   <formatItem>EXL2K</formatItem>
   <formatItem>HTML</formatItem>
   <formatItem>PDF</formatItem>
   <taskType>TaskWFServerProcedure</taskType>.
.
.
<taskType>TaskWFServerProcedure</taskType>
Example: Limiting the Available Distribution Methods
In
this example, only Email and Library will display as available distribution
methods in the scheduling tool. Other methods (<methodItem>)
have been deleted from the Custom template.
</destinationPreference>
<methodItem>EMAIL</methodItem>
<methodItem>LIBRARY</methodItem>
<storageLibraryPreference __cn="ibi.broker.api.data.preference.schedule.StorageLibraryPreference">
Example: Limiting the Available Tasks
In
this example, only Standard Reports and My Reports will display
as available tasks in the scheduling tool. Other tasks (<taskType>)
have been deleted from the Custom template.
<formatItem>SVG</formatItem>
<taskType>TaskStandardReport</taskType>
<taskType>TaskMyReport</taskType>
<alertType>AUTO</alertType>
Example: Limiting the Available Scheduling Intervals
In
this example, only Daily, Weekly, Monthly, and Custom periods will
display as available intervals in the scheduling tool. Other intervals
(<timeInfoTypeItem>) have been deleted from the Custom template.
<timeInfoPreference __cn="ibi.broker.api.data.preference.schedule.TimeInfoPreference">
   <show>true</show>
   <collapsed>false</collapsed>
   <timeInfoTypeItem>DAY</timeInfoTypeItem>
   <timeInfoTypeItem>WEEK</timeInfoTypeItem>
   <timeInfoTypeItem>MONTH</timeInfoTypeItem>
   <timeInfoTypeItem>CUSTOM</timeInfoTypeItem>
   <secondaryRunInterval>true</secondaryRunInterval>
</timeInfoPreference>
x
Configuring for FTP Distribution
If you are using prepared reports, the web and application
servers require write access to the directory to which FTP reports
are distributed. By default this is:
/install_directory/ibi/WebFOCUS80/ibi_html/prepared
This directory is determined by the BKR_REPORT_DIR parameter
in the following file:
/install_directory/ibi/WebFOCUS80/client/wfc/etc/cgivars.wfs
x
Configuring ReportCaster for Graphs
In order for ReportCaster to distribute
graphs, you must either set DISPLAY or use the headless option.
This is similar to the Server Side Graphics configuration discussed
in Verifying and Troubleshooting Server Side Graphics (PCHOLD).
x
Procedure: How to Configure ReportCaster for Graphs
The
procedure for distributing graphs will depend on whether you have
an X Windows Server.
To distribute graphs, do one of the following:
- If you have an X
Windows Server, you can set the DISPLAY variable to the X Server
host name. Ensure that the X Server accepts the connection. You
can set this by editing the following file:
/install_directory/ibi/WebFOCUS80/ReportCaster/bin/schbkr
Add
a line to export the DISPLAY variable. For example:
#!/bin/ksh
 export DISPLAY=localhost:0
CLASSPATH=/usr/local/drivers/ojdbc15.jar:
  /home/wf80/ibi/WebFOCUS80/ReportCaster/lib/SCHScheduler.jar
export CLASSPATH
java ibi.broker.SCHScheduler /home/wf80/ibi/WebFOCUS80/ReportCaster
-
If you do not
have an X server, you can set the headless Java option when the Distribution
Server starts. However, this does not support GIF graphs or the
older GRAPH32 engine. To set this, edit the following file:
/install_directory/ibi/WebFOCUS80/ReportCaster/bin/schbkr
Place
the headless option after the java command. For example:
java -Djava.awt.headless=true ibi.broker.SCHScheduler
/home/wf80/ibi/WebFOCUS80/ReportCaster