Upload Wizard

How to:

The Upload Wizard enables you to upload files from your local machine to server application folders and to load them into a DBMS for use in creating synonyms and procedures. You can then run a procedure with or without email, or schedule it.

The wizard enables you to:

The Upload Wizard displays these steps on the ribbon, as shown in the following image.

When you complete a task, the wizard automatically moves to the next step.


x
Procedure: How to Use the Upload Wizard to Upload a File and Create a Synonym
  1. From the Web Console, click the Upload Wizard icon, as shown in the following image.

    The Upload Wizard opens to the Upload pane.

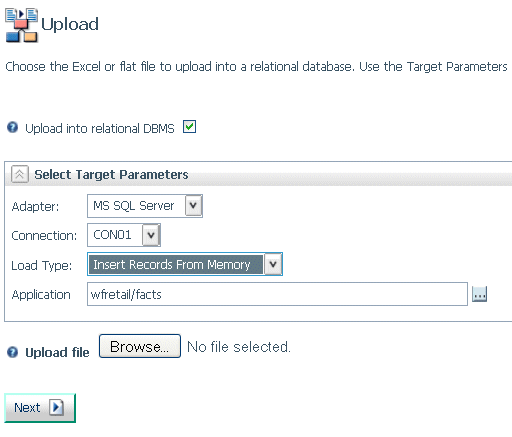
    The following image shows the parameters available when you have a relational adapter configured.
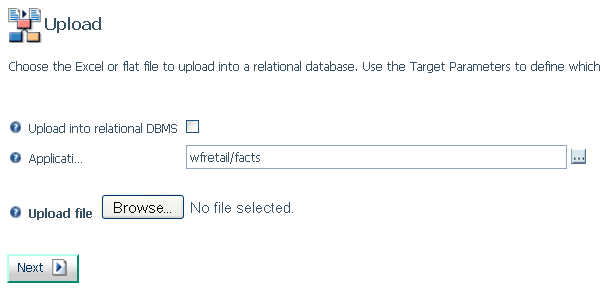
    If you do not want to upload into the DBMS, uncheck the Upload into relational DBMS check box. This removes the parameters for uploading into the DBMS, as shown in the following image.
  2. The type of upload depends on whether the Upload into relational DBMS check box is selected.
    • If it is checked, the file will be uploaded into the DBMS.
    • If it is unchecked, the file will be uploaded into an application folder in its original format.
  3. For upload into a relational DBMS, select the adapter, connection, and load type. The load type is either to load from memory or to use a bulk load utility, if one is available for the selected adapter.
  4. Accept the default application name, enter an application name in the Application text box, or click the file selector button to select an application.
  5. Select an upload file by clicking the Browse button and navigating to the file you want to upload.
  6. Click Next.

    The Select Candidates screen is displayed. The screens will vary, depending on the type of file uploaded.

  7. Enter parameters for the synonym, if any, and click Next.

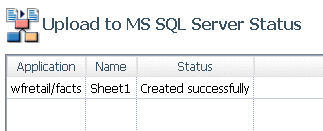
    The synonym is created, as shown in the following screen.
  8. Click Next.

    The Edit Metadata pane opens.

  9. If you do not want to edit the synonym(s) or select dimensions and measures, you can click Create Sample Procedures from the ribbon.

You can then run the procedure with email or schedule it to run once or multiple times.

To exit the Upload Wizard, click Full Console.


Top of page

x
Procedure: How to Use the Upload Wizard to Edit Metadata

The Edit Metadata page optionally enables you to select the synonym you wish to edit.
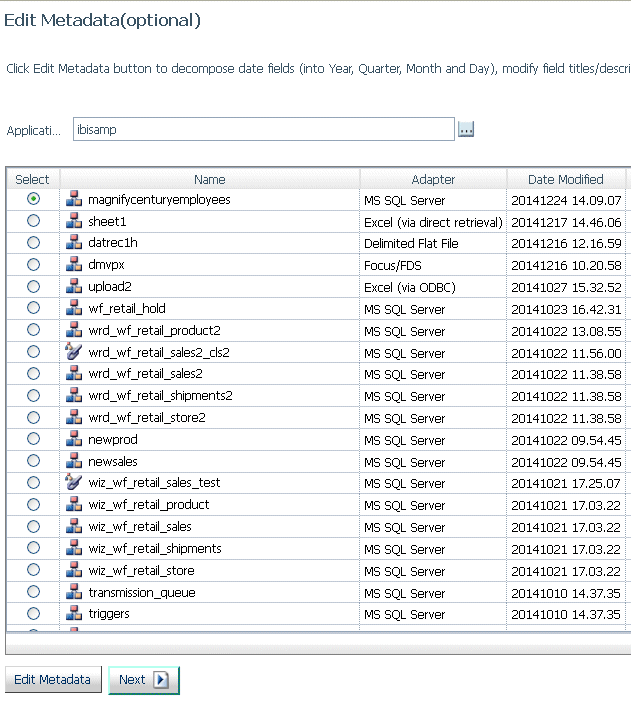
  1. Select the check box next to the synonym you want to edit, and click Edit Metadata at the bottom of the page, as shown in the following image.

    It displays the fields in the synonym and their attributes, as shown in the following image.
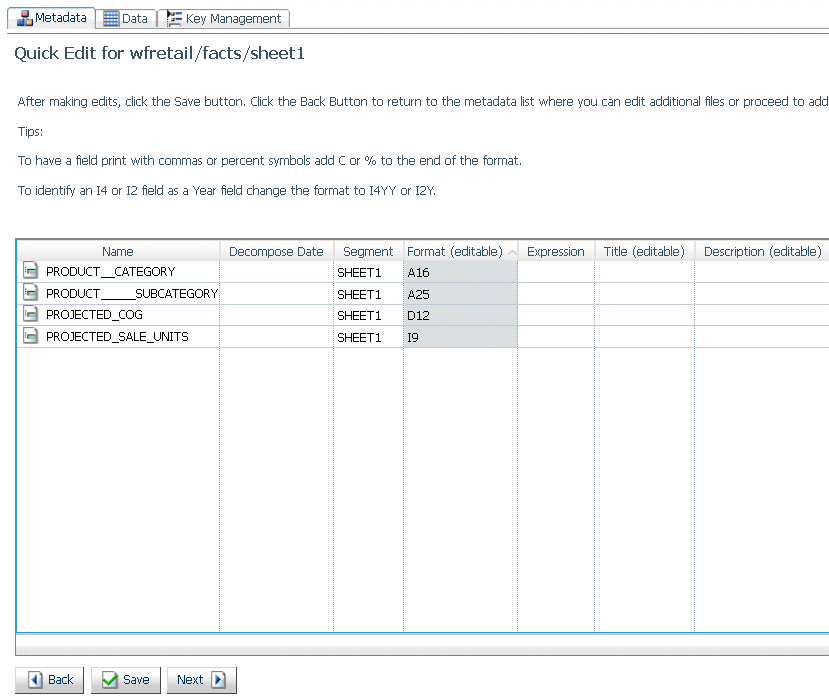
  2. On the Metadata tab, you can edit the field formats and edit the Title and Description attributes.
  3. The Data tab displays the data in the file.
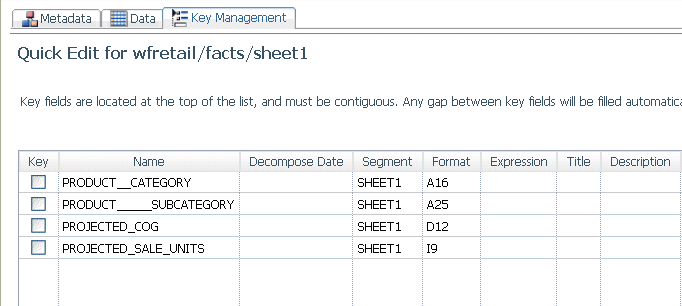
  4. On the Key Management tab, you can select key fields by selecting a check box next to a field name, as shown in the following image.

    If you selected key fields, click Apply.
  5. When you are finished editing the metadata, click Save on the Metadata tab, then click Next.

You can now add dimensions and measures to the synonym.


Top of page

x
Procedure: How to Use the Upload Wizard to Select Dimensions and Measures

The Dimensions and Measures page enables you to add dimension hierarchies to a synonym and designate measure fields.

If you do not want to add dimensions and measures, click Create Sample Procedures from the ribbon.
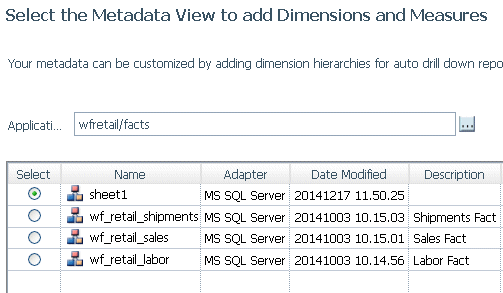
  1. On the first Dimensions and Measures page, select a synonym for which to add dimensions and measures, and click Next, as shown in the following image.

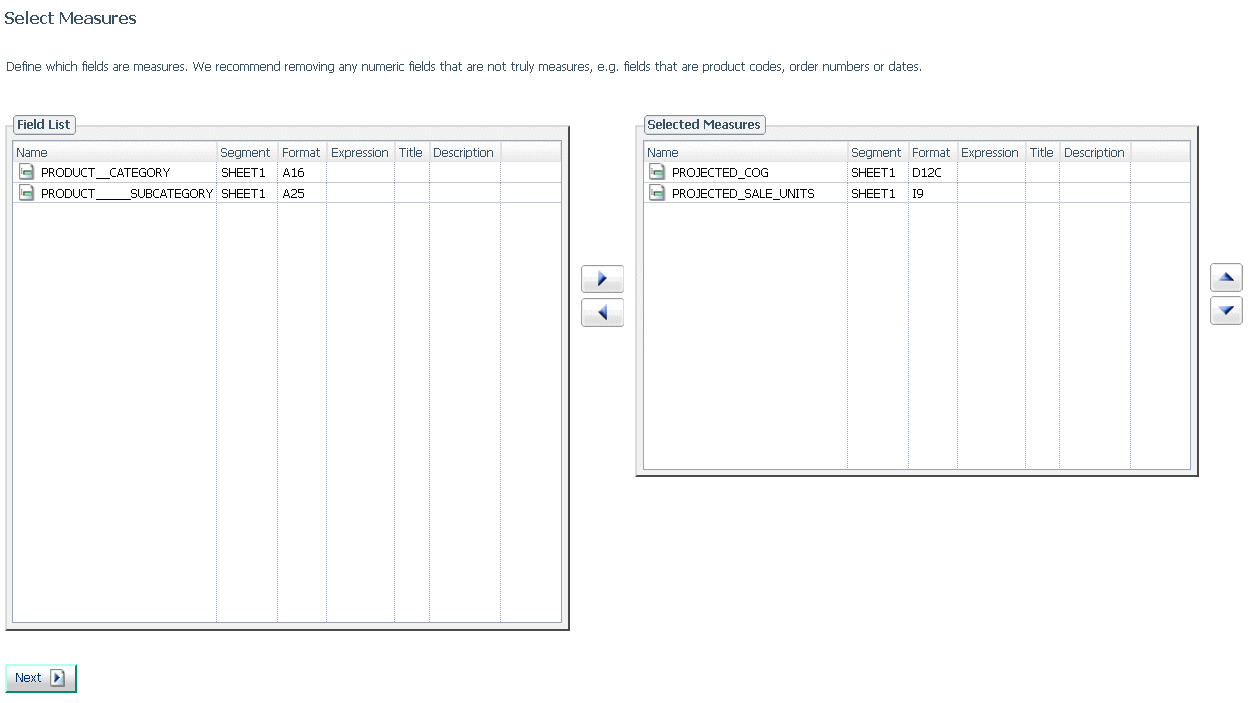
  2. The Select Measures page opens, as shown in the following image.

    The Select Measures page contains a Field List pane and a Selected Measures pane. Initially, all numeric fields appear on the Selected Measures pane. Some numeric fields may not be measures (you will not aggregate them). You can move fields between the panes using the left and right arrows. You can move measures up or down on the Selected Measures pane using the up and down arrows.

    When you have selected the appropriate measures, click Next.

    The Add Dimension Hierarchy based on Levels page opens, as shown in the following image.
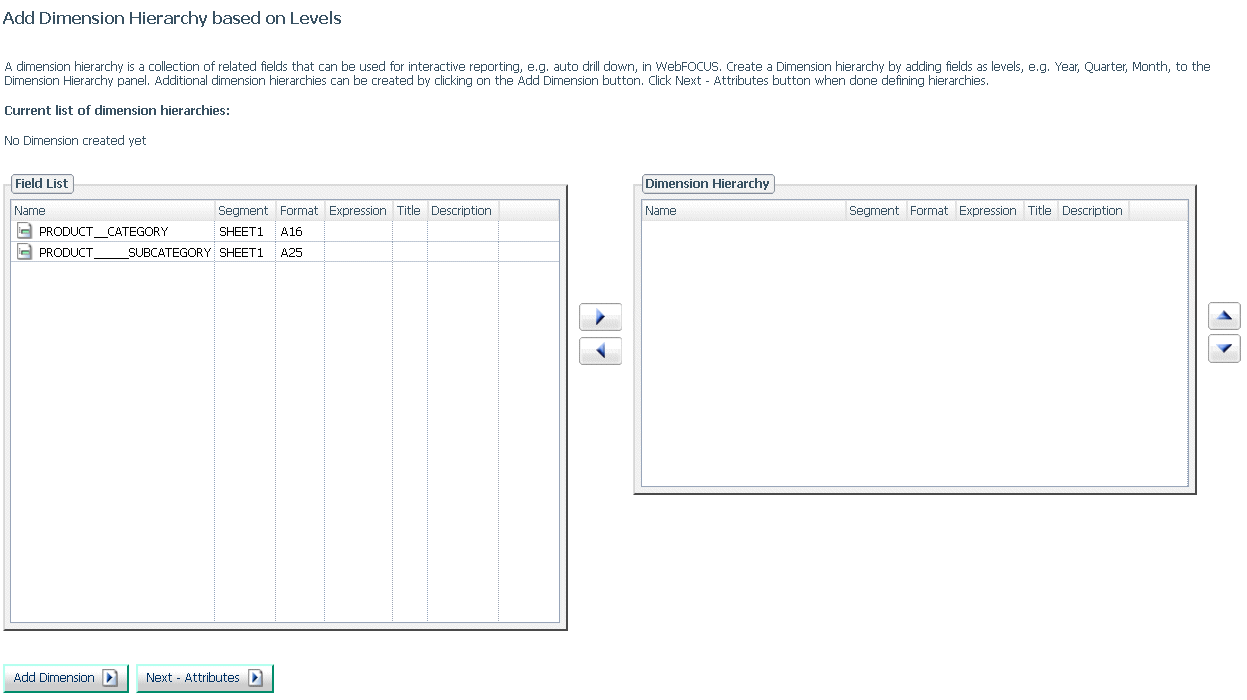
  3. For each dimension, move the fields that participate in a dimension hierarchy to the Dimension Hierarchy pane, and click Add Dimension. The dimension is added to the synonym.
  4. When you have completed all dimensions, click Next - Attributes.

    The Select Dimension Attributes page opens, as shown in the following image.

  5. Assign the remaining fields to a dimension level by selecting the appropriate levels from the Target Level drop-down list, and click Next.

    A summary page lists the number of measures, dimensions, and attributes in the synonym.

  6. Click Next to create sample procedures.

Top of page

x
Procedure: How to Use the Upload Wizard to Create Sample Procedures
  1. If you did not add dimensions and measures, click Create Sample Procedures from the ribbon.

    The Select Report Measures pane opens, as shown in the following image.
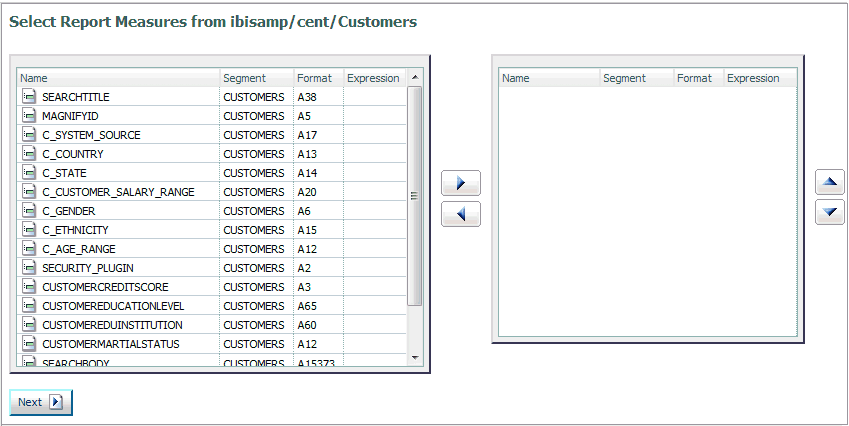
  2. Select fields from the left side, click the arrow icon to move them to the right, and click Next.

    The Select Report Rows pane opens, as shown in the following image.
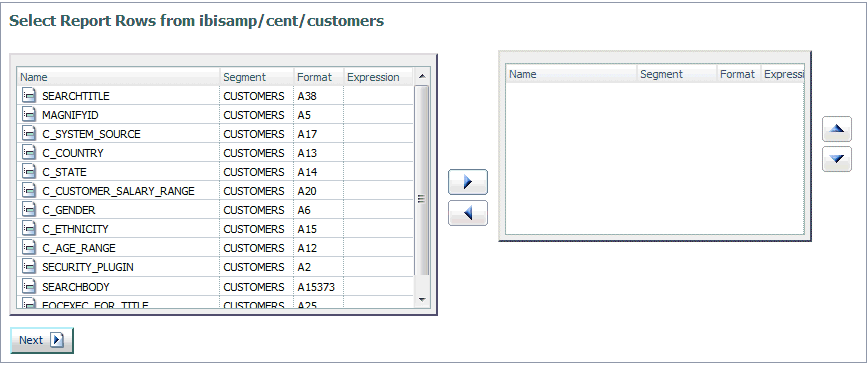
  3. Select fields from the left side, click the arrow icon to move them to the right, and click Next.

    The Select Report Columns pane opens, as shown in the following image.
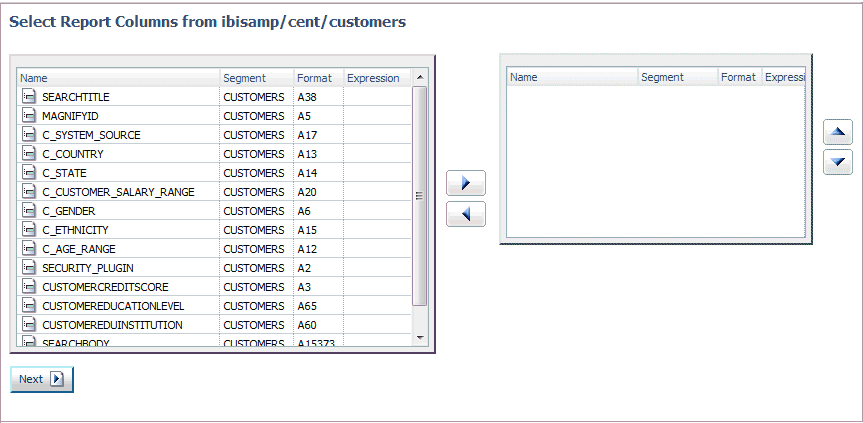
  4. Select fields from the left side, click the arrow icon to move them to the right, and click Next.

    The Reporting Wizard completed pane opens, as shown in the following image.

  5. Click Run to run the procedure.

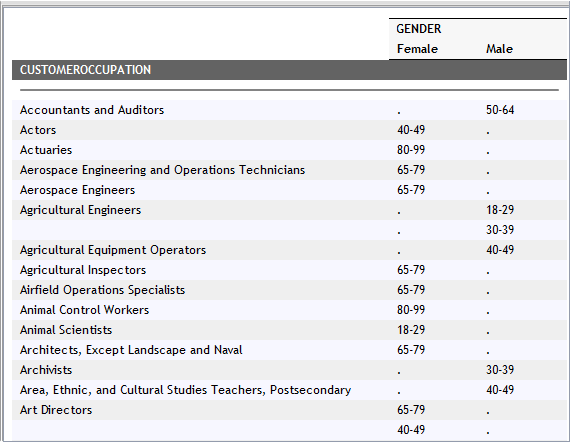
    The resulting report is displayed, as shown in the following image.
  6. Click Next (Scheduler and E-Mail) to submit the procedure with email or schedule it.

Top of page

x
Procedure: How to Use the Upload Wizard to Run, Email, or Schedule a Procedure

After you have created a test report with the Upload Wizard, you can run the procedure, submit it to run with email, or schedule it.

  1. From The Reporting Wizard completed pane, click Next (Scheduler and E-Mail) or click Run, E-Mail, Schedule from the ribbon.

    The Run, E-Mail, Schedule page opens, as shown in the following image.
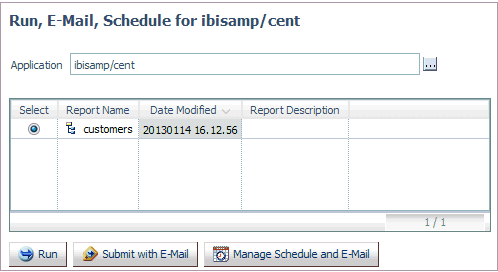
  2. Click Run to run the report.
  3. Click Submit with E-Mail to submit the procedure and specify start or completion email.

    The Submit procedure with E-Mail pane opens.

  4. To schedule the procedure, click Manage Schedule and Email.

For information on email and scheduling options, see Sending an E-mail Notification for a Procedure and Scheduling a Procedure.

To exit the Upload Wizard, click Full Console.


iWay Software