Tools to troubleshoot App Studio are available in the
WebFOCUS Administration Console, App Studio program folder, and
Reporting Server Console.
xAccessing the Verification Tools in the WebFOCUS Administration Console
To run the verification tools installed with the WebFOCUS
Administration Console, access the console.
x
Procedure: How to Access the WebFOCUS Administration Console
-
Ensure that Apache Tomcat and/or IIS
are started.
-
From the
Windows Start menu, select All Programs, Information
Builders, WebFOCUS 80 App Studio, WebFOCUS
App Studio Utilities, and then click WebFOCUS
Administration Console.
If you are using Apache Tomcat standalone, you can also
go to:
http://localhost:8080/ibi_apps/console/webfocusconsole.jsp
For IIS with Tomcat, you can go to:
http://localhost/ibi_apps/console/webfocusconsole.jsp
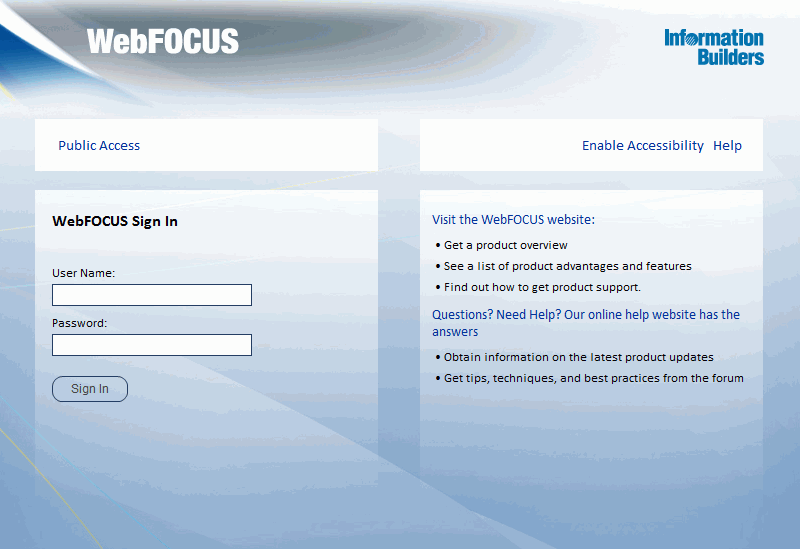
The WebFOCUS Sign In page opens, as shown in the
following image.
If
the WebFOCUS Sign In page does not appear, ensure that your web
server is started. If the web server is started and this page does
not appear, you may need to manually configure the web server, as
explained in Configuring the Web Server or Application Server.
-
Sign in
using an administrator user ID. The initial default user name and password
is admin.
The WebFOCUS Administration Console opens,
as shown in the following image.
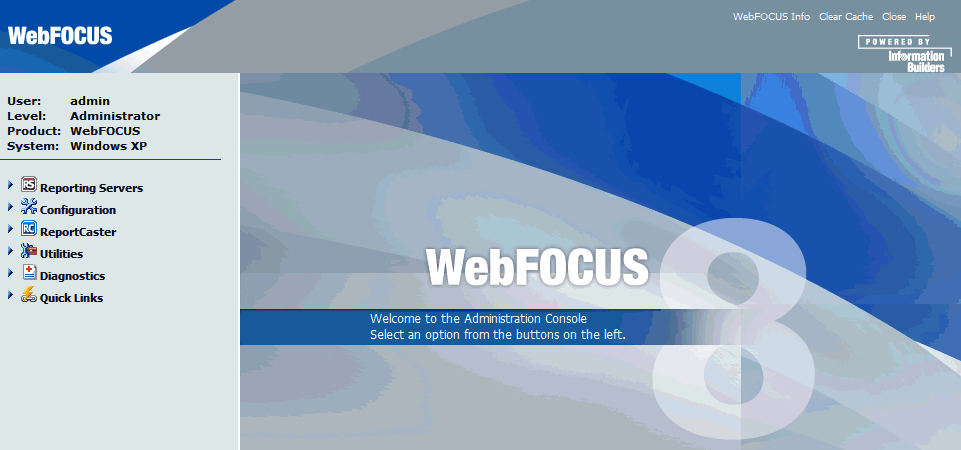
Using
this console, you can edit various configuration settings. Information
about the various settings in this console can be found by clicking Help.
The WebFOCUS Administration Console contains a verification tool
to further test the configuration.
-
On the left
of the WebFOCUS Administration Console, expand Diagnostics.
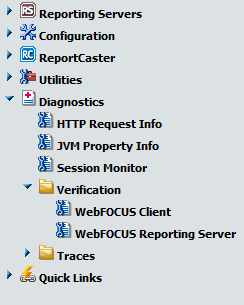
Several
tests are available from the Diagnostics node.
x
Procedure: How to Test the WebFOCUS Client
Expand Verification and
then click WebFOCUS Client.
A page
similar to the following image appears on the right with a list
of tests. The list varies depending on your license and configuration.
For a Tomcat standalone configuration, the web/app server tests
may not appear.
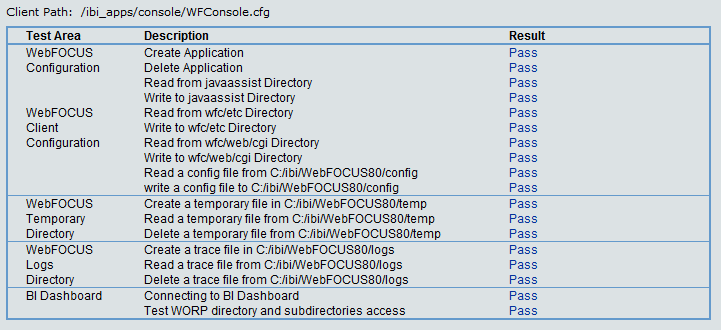
If
a test fails, a Possibilities link appears providing information
on what the problem might be and possible solutions. The verification
tools are only supported with Internet Explorer, and you may receive
errors if you use other browsers.
x
Procedure: How to Test the WebFOCUS Reporting Server
Expand Verification and
then click WebFOCUS Reporting Server to test
the connection between the WebFOCUS Client and the WebFOCUS Reporting
Server.
The Client Path field is displayed with the path to
the WFConsole.cfg file. You are also allowed to select a node in
the Remote Services area.
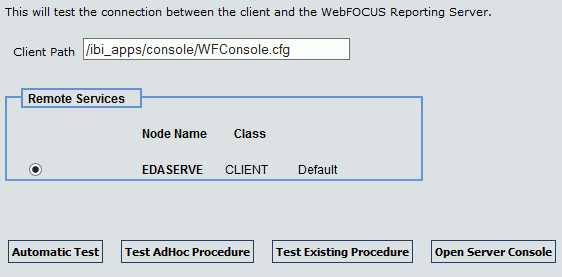
The
Client Path specifies how the connection is made. The default servlet
URL appears.
You can test the following areas:
-
Automatic Test. Checks
connections and checks to see if you can list applications under
the approot directory, if you can create and delete an application, and
if you can run stored procedures and ad hoc reports. When you are
finished, click Back to return to the previous
screen.
-
Test AdHoc Procedure. Opens
a window containing a default ad hoc procedure. You will be prompted
for credentials if the server is secure. Click Run to
execute the procedure, or you can edit the procedure first. You
can also change the application path (using APP PATH, not EDAPATH).
The procedure can consist of WebFOCUS or SQL commands. When you
are finished, click Back to return to the
previous screen.
-
Test Existing Procedure. Allows
you to type an existing procedure name and any necessary parameters.
The procedure must be stored on the WebFOCUS Reporting Server. You
can also change the application path. Click Run to
execute the procedure. When you are finished, click Back to
return to the previous screen.
-
Open Server Console. Opens
the Reporting Server Console.
x
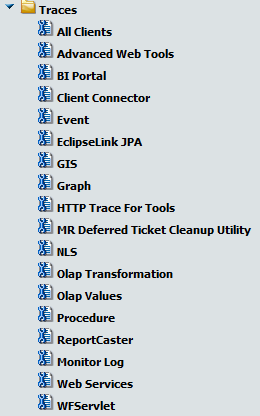
The Diagnostics menu in the WebFOCUS Administration
Console lets you view and delete WebFOCUS Client trace files. Trace
files track requests processed by the WebFOCUS Client. Since tracing
can slow performance, you should only turn on traces when troubleshooting.
x
Procedure: How to View WebFOCUS Client Traces
In the left pane of the WebFOCUS Administration Console,
expand Diagnostics, and then expand Traces.
You can view the trace files by selecting the type of trace from
the list. For example, to view traces generated by the WebFOCUS
Servlet, in the left pane of the WebFOCUS Administration Console
under Diagnostics and Traces, select WFServlet.
The
following image shows the WebFOCUS client traces screen.
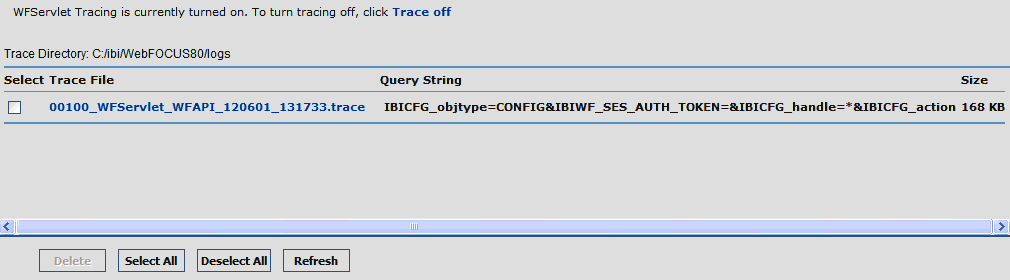
A
page lists any generated traces. The first column lists the generated
trace file. The second column shows a timestamp for when the request
ran. You can view a trace file by clicking it.
For more information
about the available trace options, click Help in
the top-right corner of the WebFOCUS Administration Console.
x
The App Studio trace utility (Communication Layer Trace)
generates trace files for tasks performed by the App Studio development
environment communication layer. It captures information for tasks
performed by App Studio when a request is submitted or retrieved
by the product.
You can use this utility to help troubleshoot issues, such as
communication failures, connection problems, and transfer of files.
To generate traces for issues you might encounter at startup,
you should start the trace utility prior to launching App Studio.
To generate traces for a failure to connect to a Data Server
or to determine why applications are not listed, you should start
and enable the trace at the point prior to performing the task that
fails.
x
Procedure: How to Use the Communication Layer Trace
-
Launch the
Communication Layer Trace from the Windows Start menu by selecting All
Programs, Information Builders, WebFOCUS
80 App Studio, WebFOCUS App Studio Utilities,
and Communication Layer Trace.
The Communication Layer Trace tool opens,
as shown in the following image.
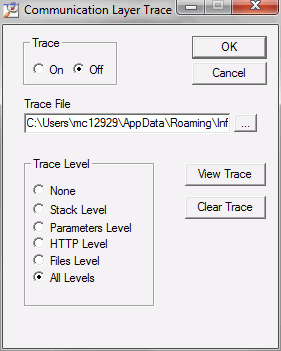
-
Click the On radio
button to enable tracing.
-
The Trace
File field indicates the location and name of the trace file. The default
trace file is created in the following location for Windows 7:
drive:\Users\user_id\AppData\Roaming\Information Builders\
wfscom.xml
where:
- user_id
Is your Windows user ID.
Note: The Application Data directory
may not be visible by default. To see this directory, open Windows
Explorer, click Tools, choose Folder
Options, and select the View tab.
Then select Show hidden files and folders and
click OK.
-
In the Trace
Levels area, keep the default All levels to
capture all required information or specify a specify level.
xWebFOCUS Reporting Server Traces
You can turn WebFOCUS Reporting Server traces on when
you start the server or dynamically after the server has started.
- To start the server
with traces, you should start it before App Studio by selecting Programs from
the Start menu, then Information Builders, WebFOCUS
80 App Studio, WebFOCUS 80 Server for App
Studio, Diagnostic Functions,
and Start Security OFF with Traces.
- To turn traces on
dynamically, access the Server Console and select Workspace,
Diagnostics, and Traces.
Note: Viewing traces is only available to a
server administrator.
You can use the Reporting Server Console to view server traces,
as well as turn them dynamically on or off for a running server.
If tracing is set to off and it was never turned on, the page
shows that no traces are available and enables you to turn traces
on. If tracing is on, the page displays the available traces in
drop-down boxes. Which traces are available depends on what requests
were made against the server.
To turn traces on dynamically, click Enable Traces.
Be aware that a dynamic trace is not the same as turning traces
on at server startup. A dynamic trace is usually not sufficient
for following a problem through with Customer Support, but it may suffice
for other purposes, such as seeing how something is parsed.
Note: The default for tracing is to trace all
components when tracing is turned on. However, the trace settings
file (ibitrace.fex) may have been altered. Therefore, components
that you expect to be traced may not be traced.
x
Procedure: How to View a Trace File
-
From the Web Console, select Workspace.
-
In the left
panel, expand the Logs and Traces folder.
-
Double-click Traces,
or right-click Traces and click View.
A list of traces displays in the right panel.
-
Right-click
a specific trace file and then choose from the following options:
-
View. Displays the trace in the right-hand browser pane.
-
Open or Save. Enables you to open the trace in a local editor
or to save it to a local disk.
-
Delete. Deletes the selected trace.
The file opens, or is deleted, according to the option
you choose.