Setting a Basis for Descending Measures
|
How to: |
PMF allows you to specify how Percent Reached should be calculated for descending measures with targets set at zero, or where misleading negative Percentages Reached values are shown.
Note: In previous versions of PMF, if there was a descending measure configured and that measure had a target of zero, or if the Actual of the descending measure was very far from the Target in the wrong direction, PMF would automatically calculate Percent Reached as 0% or display a very high negative Percent Reached.
Basis controls where you would have zero Percent Reached. The basis is the point you would exceed with your descending measure greater than which your Percent Reached would start moving into the negative. Any Actuals that were greater would show a negative Percent Reached, while any that were less will show a positive Percent Reached. Setting the Basis gives you control over how Percent Reached is calculated so you can see more reasonable Percent Reached values.
Procedure: How to Configure Descending Measure Basis
To configure the Basis for a descending measure:
- In the Manage
(or Author) page, click the Measures panel
button. Select the measure you wish to change.
The Edit Measure panel opens.
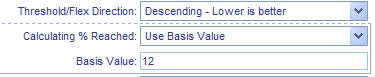
- Select Use
Basis Value from the Calculating % Reached drop-down
menu. The panel expands and shows the Basis Value field box, as shown
in the following image.
Tip: The Basis can be set by analyzing the extend of your Actuals. For example, if your Target is set to zero, the median of your Actual values is 12, and the extent is 30, you could choose 12, as it is the most typical, or median value. You could also do a Pareto analysis and decide that 80% of your measures should have positive Percent Reached values. Suppose a Pareto analysis indicates that 80% of your Actual value spread fell under 18. You could set the Basis to 18 so that any Actual values approaching upward to 18 were scaled down from 100% and any values exceeding it would be negative. If you never want to see a negative Percent Reached, you would set the Basis to the extent of your values. Any Actual values that are precisely at the Basis will show zero Percent Reached.
- Click Save to save the changes.