Creating Outbound Messages
  1. Log in to your Salesforce.com account.
  2. Click the drop-down menu on the top of the screen that shows your name and then Setup, as shown in the following image.

    The Getting Started page opens.

  3. In the App Setup tree, expand Create and then Workflow & Approvals. Click Outbound Messages, as shown in the following image.

    Note: If you already defined an outbound message for your workflow, you can choose the Existing Option action.

    The All Outbound Messages window opens.

  4. Click Create New.

    The Step 1 of the New Outbound Message window opens.
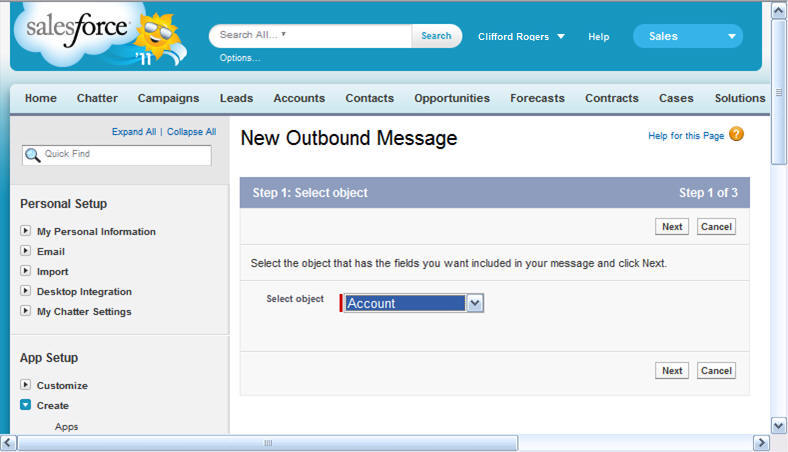
  5. Select Account from the Select Object drop-down menu, as shown in the following image.

    Click Next.

  6. In step 2 of the New Outbound Message window, enter the Name, Unique Name, Endpoint URL, and User to send as information, as shown in the following image.

  7. Save these changes.

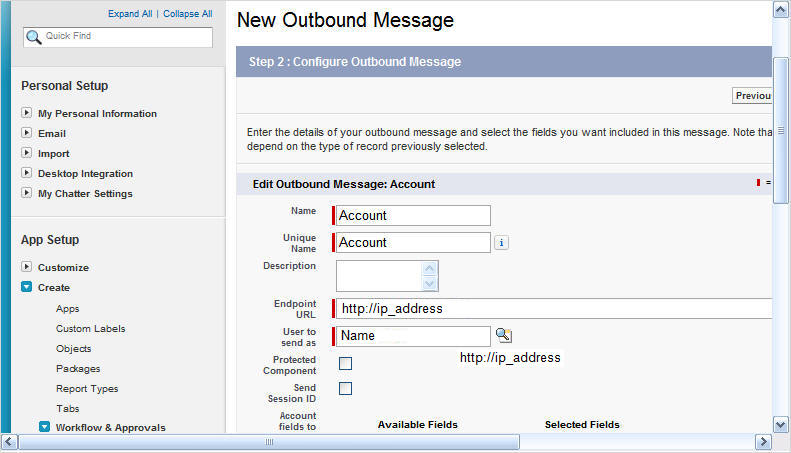
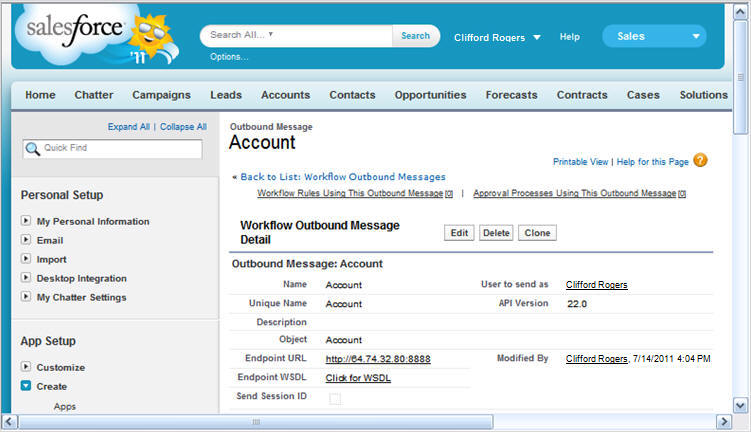
    Review the outbound message details, as shown in the following image.


WebFOCUS