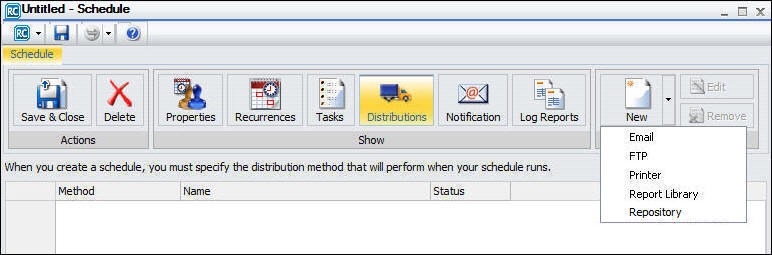
The Distributions tab in the Advanced Scheduling tool provides the options available for distributing the scheduled report procedure (FEX), as shown in the following image.
You can distribute a report using one of the following methods.
Note:
How to: |
When you distribute a report through email, you can include the report in the body of the email (known as an inline email message) or send it as an attachment. Only the HTML, DHTML, WP, and DOC formats can be distributed as an inline email message.
Distributing a report as an inline email message is particularly useful when the report is distributed to mobile devices, fax machines, or through email systems that do not support attachments.
Note: To send an inline email message to a fax machine, you must register your email address with a third-party email distribution provider. The features offered by providers, such as supported area codes and file formats and requirements on the structure of email parameter values, may vary. It is important that you select a provider whose features are compatible with ReportCaster.
The following image shows the email distribution options in the Distribution tab of the Advanced Scheduling tool when the Email method is selected.

Note:
The Distribution dialog box appears, as shown in the following image.
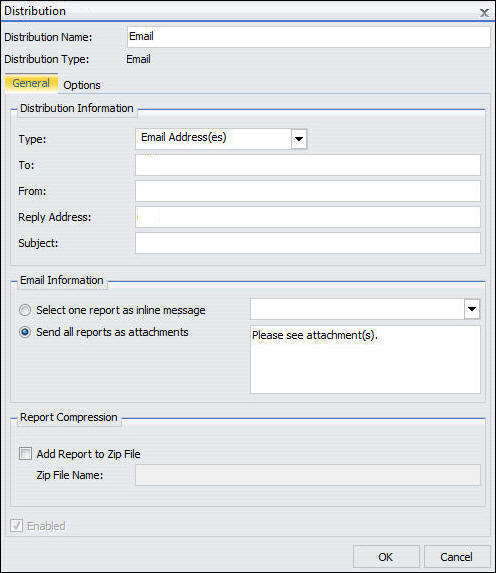
Email is the default value.
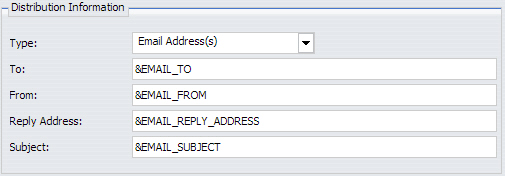
Note: You can use parameters (amper variables) when specifying settings in a schedule. These parameters can be system variables, such as &DATE or any amper variable for which a value is returned by the Reporting Server when the scheduled procedure is executed. If a value for a parameter specified in a schedule is not returned by the Reporting Server when the procedure executes, the schedule will fail with a "No report to distribute" error. If the scheduled task is burst, you can also use the ‘%BURST' symbol in the Email Subject, Email Message, or Zip File Name settings.
Additionally, you can use group mail lists (defined on your mail server) with the Email Address(s) option. Group mail lists enable you to distribute a report or notification to multiple recipients without having to maintain multiple email addresses in the WebFOCUS Repository. The format of the group mail list depends on the mail server that you use. For example, if you are using a Microsoft Exchange Server and your group mail list is defined as #group1, you would enter group1@listdomain in the Email Address(s) fields. If the group mail list contains a space within its name, enclose the space with double quotation marks ('' ''). For more information, see your mail server administrator.
Note: You can use parameters (amper variables) when specifying settings in a schedule. These parameters can be system variables, such as &DATE or any amper variable for which a value is returned by the Reporting Server when the scheduled procedure is executed. If a value for a parameter specified in a schedule is not returned by the Reporting Server when the procedure executes, the schedule will fail with a "No report to distribute" error. If the scheduled task is burst, you can also use the ‘%BURST' symbol in the Email Subject, Email Message, or Zip File Name settings.
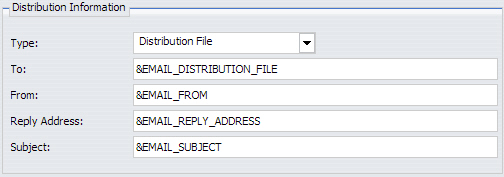
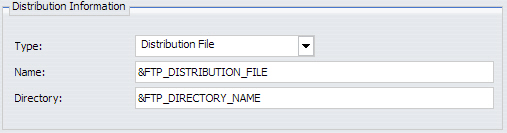
When Dynamic Distribution List is selected, the To field is enabled to facilitate the selection of the Procedure Name. Once a procedure is selected, you can pass a parameter on the command line of the fex, as shown in the following image.
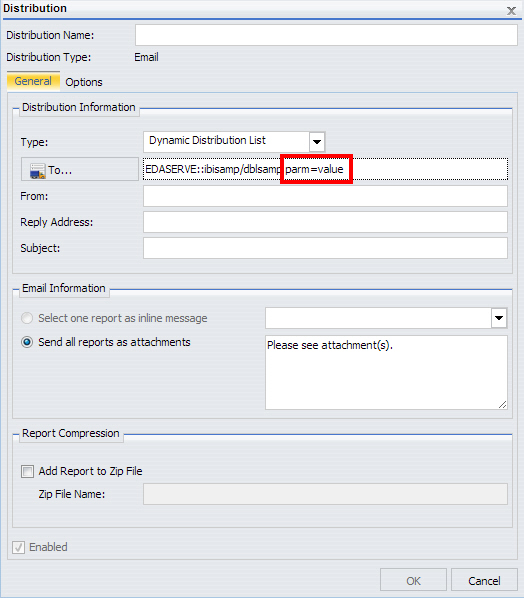
By default, the Add Report to Zip File check box is not selected and the Report will not be compressed.
The Email distribution is listed in the table within the Distribution tab.
After you specify distribution options for Email in the Advanced Scheduling tool, you can customize settings for Mail Server Information.
The Options tab displays, as shown in the following image.
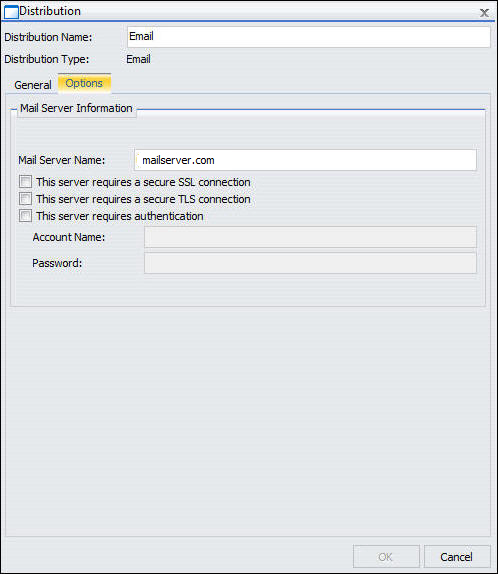
The default Mail Server displays in the Mail Server Name field.
If you select this check box, the Account Name and Password field check boxes are enabled, allowing you to set values for these fields.
How to: |
This section provides information about distributing scheduled output using File Transfer Protocol (FTP).
The Distribution dialog box appears, as shown in the following image.
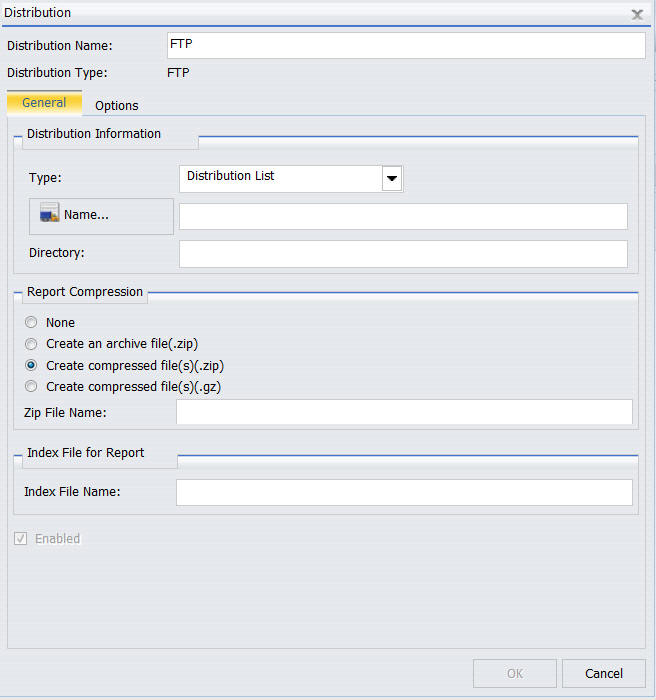
FTP is the default value.
Note: You can use parameters (amper variables) when specifying settings in a schedule. These parameters can be system variables, such as &DATE or any amper variable for which a value is returned by the Reporting Server when the scheduled procedure is executed. If a value for a parameter specified in a schedule is not returned by the Reporting Server when the procedure executes, the schedule will fail with a "No report to distribute" error. If the scheduled task is burst, you can also use the ‘%BURST' symbol in the Email Subject, Email Message, or Zip File Name settings.
Note: You can use parameters (amper variables) when specifying settings in a schedule. These parameters can be system variables, such as &DATE or any amper variable for which a value is returned by the Reporting Server when the scheduled procedure is executed. If a value for a parameter specified in a schedule is not returned by the Reporting Server when the procedure executes, the schedule will fail with a "No report to distribute" error.
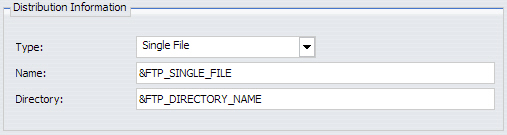
Note: When scheduling an FTP distribution, the maximum number of characters you can specify for the directory is 255, including the full path name.
Note: The default setting for Report Compression is derived from the configuration settings. For more information, see Zip Settings.
Note: Availability of this option is dependent on your ReportCaster configuration. For more information, see FTP Settings. For WebFOCUS Server Procedures, if you are going to specify that the report is to be burst, type the name of the file in which you want the index page to be created.
Important: You must type the name of the index in the case specific to your operating system.
The following table lists the case you should use for a specific operating system.
|
Case |
Operating System |
|---|---|
|
Uppercase |
z/OS |
|
Lowercase |
Windows UNIX |
Note: Index pages for burst report output contain only the burst values specified in the Distribution List.
The schedule to distribute appears in the Advanced Scheduling tool.
After you specify distribution options for FTP in the Advanced Scheduling tool, you can customize settings for FTP server information.
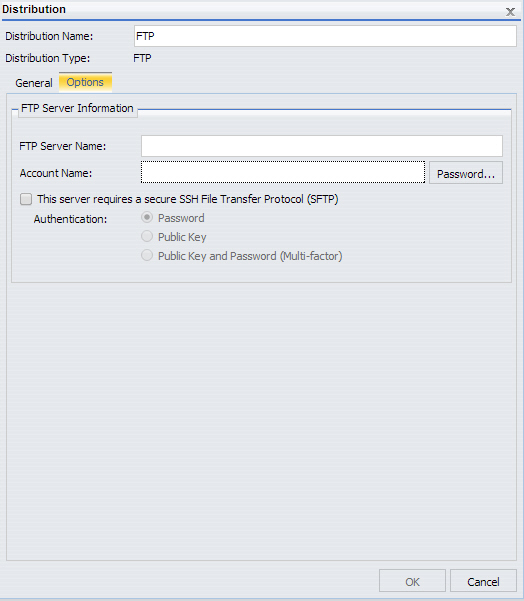
The current value for FTP Server Name and Account Name display, by default.
Note:
How to: |
The report formats that support printing are DOC, PDF (when you configure ReportCaster to allow print distribution for PDF format and the printer has the appropriate driver), PS, and WP. For more information, see ReportCaster Configuration.
Note: Problems may occur in printed output if the distributed reports contain UTF-8 characters.
The Distribution dialog box opens, as shown in the following image.
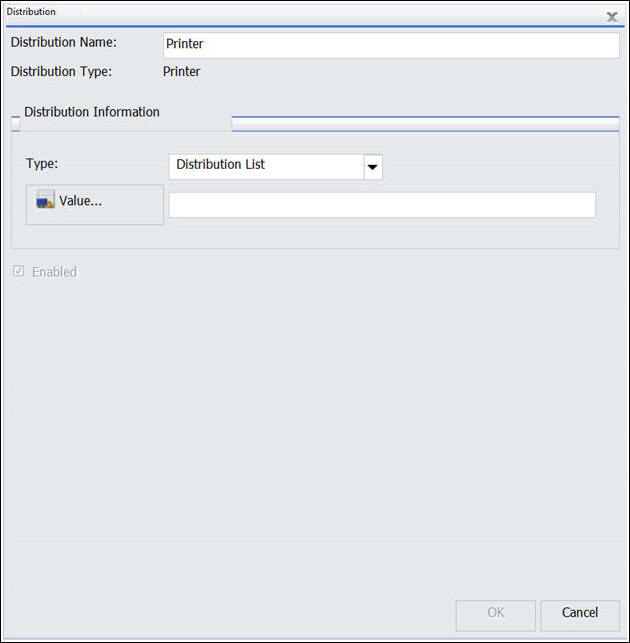
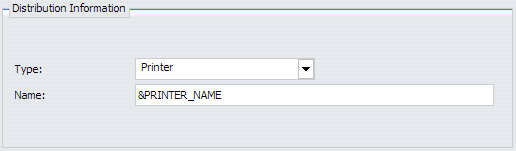
Printer is the default value.
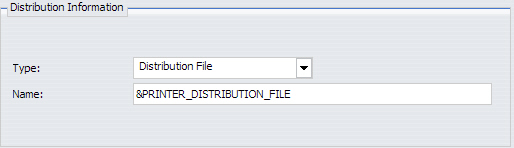
The following distribution output types are available for Print in the Advanced Scheduling tool.
Note: You can use parameters (amper variables) when specifying settings in a schedule. These parameters can be system variables, such as &DATE or any amper variable for which a value is returned by the Reporting Server when the scheduled procedure is executed. If a value for a parameter specified in a schedule is not returned by the Reporting Server when the procedure executes, the schedule will fail with a "No report to distribute" error.
queue@printserver
where:
Is the name of the printer queue.
Is the host name or IP address of the printer.
Note: ReportCaster can differentiate between the printer queue and the printer host name or IP address due to the presence of an at sign (@) separator. Although ReportCaster supports specifying only the host name or IP address of the printer, we recommend that you specify both the printer queue and host name or IP address when distributing ReportCaster output to a printer. The maximum length of this field is 800 characters.
Note: You can use parameters (amper variables) when specifying settings in a schedule. These parameters can be system variables, such as &DATE or any amper variable for which a value is returned by the Reporting Server when the scheduled procedure is executed. If a value for a parameter specified in a schedule is not returned by the Reporting Server when the procedure executes, the schedule will fail with a "No report to distribute" error.
The schedule task appears in the Advanced Scheduling tool.
How to: |
When scheduling a report procedure (FEX) to distribute report output to the Report Library, specify the Distribution information. The best practice when distributing reports to the Library is to create and specify a different folder location for each Library report to avoid name conflicts when creating multiple schedules for the same report procedure (FEX). This includes the WebFOCUS Repository folder to which to distribute the report, as well as Access Options. These include Owner (Private), Share to Everyone, or Access List (Share Advanced). Expiration of Reports in Library and Report Compression can also be specified.
When scheduling a report procedure for distribution to the Report Library, you select the folder to which the report output will be distributed. Using the Advanced button, you can optionally specify a subfolder to which the output will be distributed. If the subfolder does not exist, it is created dynamically during distribution of the initial schedule execution. During subsequent executions of the schedule, reports are distributed to the existing Library item wherever it is located. You must specify a pattern to be used for the title of the subfolder when the subfolder is created. The pattern can contain text, parameters (amper variables) and, if the scheduled task is burst, the ‘%BURST’ symbol. If the ‘%BURST’ symbol is used, a new subfolder is created for each burst value. You can also select the option to compress a library report when it is stored in the Repository.
You also have the option to specify a Category value to help you further organize the listing of Library reports within the ReportCaster Explorer. In the ReportCaster Explorer, a Category column is available that can be selected to sort Library reports by the Category values.
The Distribution dialog box opens, as shown in the following image.
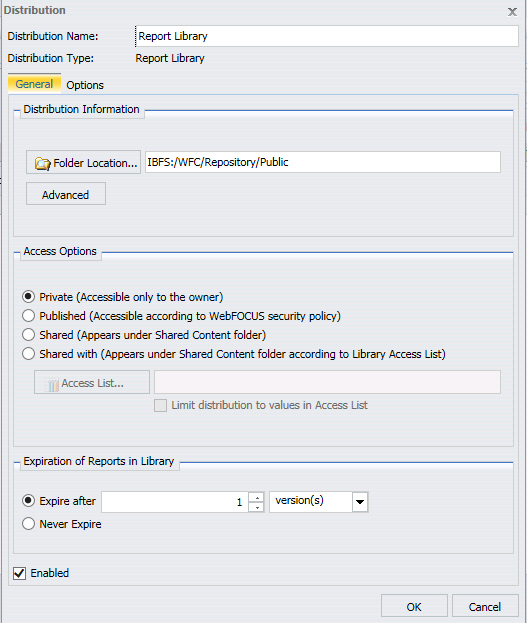
Report Library is the default value.
The folder location defaults to the same folder as the report procedure (FEX) being scheduled. Users can also select a different folder that they have authority to write to and create content in for the report to be distributed to that location.
Note: As a best practice, create and specify a different folder to which the Library reports will be distributed.
Note: You can also use parameters in the Category field. If the task is burst, you can also use ‘%BURST’.
If you select Shared with, click the Access List button to invoke the Open dialog box from which you can select an Access List that you are authorized to access.
After you specify distribution options for the Report Library in the Advanced Scheduling tool, you can customize settings for Mail Server Information.
The Options tab displays, as shown in the following image.
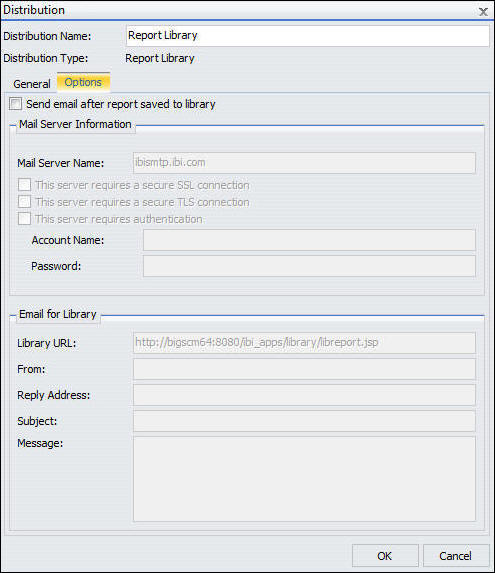
The present value for Distribution Name displays by default.
Once the Send email after report saved to library check box is selected, you can customize Mail Server Information and Email for Library settings.
If you Select the This server requires authentication check box, the Account Name and Password check boxes are available to set values for these respective fields.
How to: |
When distributing scheduled output to Managed Reporting in the Advanced Scheduling tool, specify the folder location.
The Distribution dialog box appears, as shown in the following image.

Managed Reporting is the default value.
The folder location defaults to the same folder as the report procedure (FEX) being scheduled. Users can also select a different folder that they have authority to write to and create content in for the report to be distributed successfully to that location.
How to: |
When working with schedules, you can specify more than one distribution method for one single schedule. For example, you can distribute the schedule using FTP and Email simultaneously.
Populate all required fields for the selected method. For specific guidance on using a particular method, see Using the Email Distribution Option in the Advanced Scheduling Tool, Using the FTP Distribution Option in the Advanced Scheduling Tool, Using a Printer Distribution Option in the Advanced Scheduling Tool, Using the Report Library Distribution Option in the Advanced Scheduling Tool, or Using the Managed Reporting Distribution Option in the Advanced Scheduling Tool.

You can select additional methods, or complete your schedule creation process.
| WebFOCUS |