Procedure: How to Create a New Mobile Faves Branding Application
To begin, visit the Mobile Faves Branding Components: Site/Profile Selection page at https://techsupport.informationbuilders.com/iro/MobileFaves/mfb_sitecode.jsp.
Note: If accessing the site internally, you are redirected to the Enter Site Code screen.
Enter the customer site code and click Submit, as shown in the following image.
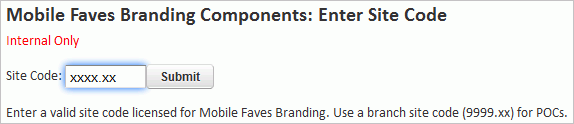
The site code must have current maintenance and be licensed for Mobile Faves Branding to continue. For Proof of Concepts, use a branch site code (9999.xx). Licensed customers will be taken directly to the profile screen.
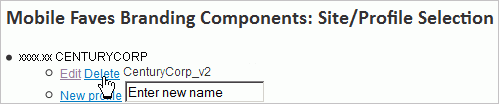
- Enter a new profile name and click New profile,
as shown in the following image.

The profile name must meet Windows naming standards and contain no blank spaces. You can have multiple profiles per site code.
- Click the Edit link next to the new profile that was created.
- Select the Build Components files to be uploaded. You
can search for files using the Browse button,
or drag files to the file input box. The file names will be changed
as appropriate when uploaded.

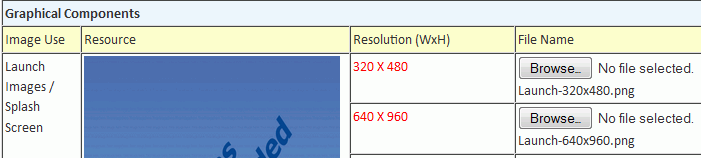
- Enter the Graphical Components files to be uploaded.
You can search for files using the Browse button,
or drag files to the file input box. The file names will be changed
as appropriate when uploaded. Image formats and pixel sizes will
be validated when uploaded and the default image will be replaced
with the uploaded image.
- Enter the Textual Components files to be uploaded.
You can search for files using the Browse button, or drag files to the file input box. The file names will be changed as appropriate when uploaded. Image formats and pixel sizes will be validated when uploaded. The default image will be replaced with the uploaded image.
- Select the language code for each language that you want
to support, as shown in the following image.

The file names will be changed as appropriate when uploaded with the language code as a prefix. Several files can be uploaded with different language codes.
- Enter the metadata, as shown in the following image.
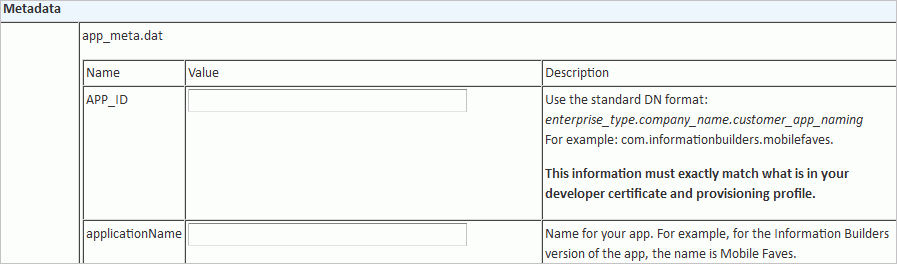
The application name will be used as the name for the resulting build.
- Click Upload Files to upload the
files and metadata.
Note: The Upload Files option is enabled after files or metadata have been added. The upload process will first validate the metadata. Image files will be validated during the upload process.
- Click Submit for Build to build
your branded application.
Note: The Submit for Build option is enabled after files or metadata have been added. You will receive a confirmation e-mail after submitting a build request.
- You will receive a second email announcing the availability
of the build once it is complete.
Return to the Mobile Faves Branding Components: Drop Box.
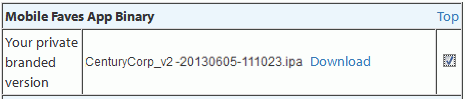
- Click the Download link to download
your branded Mobile Faves application, as shown in the following
image,

Multiple .ipa files can exist in each profile. Each file is identified by date and time of the build.