- In Developer Studio, create a project pointing to the sample directory, ibisamp, if not already created.
- Click the Procedures folder.
Note: This file is installed with the WebFOCUS Reporting Server under the ibisamp application directory.
- Select the carmgn.fex file.
- Right-click and select Edit in Developer Studio Tool.
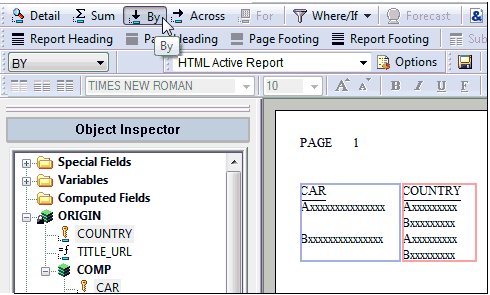
- Before the Report object, add a Set object, and set the BYDISPLAY parameter to ON to show repeated BY values.
- In the Procedure Viewer, right-click on the Report object and click Open.
- Change the output
to HTML Active Report.
Note: If you are not licensed for Active Technology, select HTML instead. In that case, you will not be able to run the aggregation reports.
- Click Options.
- From the Output Format drop-down list, expand Styled Report Formats and select HTML Active Report.
- Click Apply and then OK.
- Click Save and then Run.
- Review the naming
conventions and data.
- Review the Record
Context.
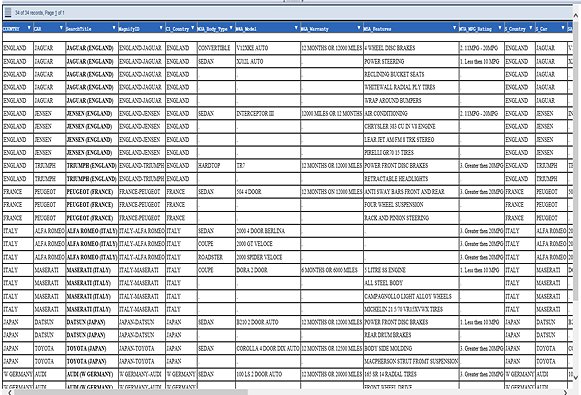
Note: Notice how multiple rows in the Car data can be used to describe a single entity based on the rollup level. In this case, there are Countries and Cars. Depending on the use case, each entity can be created as its own search result. This is done by using the highest-level field as the primary BY field. Columns are named accordingly to identify where to aggregate values across multiple rows. For example, aggregating on the COUNTRY field will generate five search results, one for each country. Therefore, separate searches for Jensen and Jaguar will both return the same search result for England.
At another level, the Car data has 18 individual models. However, if users are to search on any model, only a single car type search result would be returned.
For example, rolling up Model By Car reveals that there are 10 cars. Thus, 6 rows of data found for BMW will be aggregated into a single search result.

- Close the Developer Studio Viewer and Report Painter.
- Review the Record
Context.
- Double click the carmgn.fex file.
- Review each Engine object
by clicking on it.
DELIMITER. Used internally to separate a list of values generated by the Format Magnify procedure in order to aggregate multiple rows into a single search result. This value should be a unique value not found anywhere in the content that is being indexed.
BATCHSIZE. Incremental number of records to feed to Magnify at a time.
Note:
- This is critical when indexing large volumes of data. This setting will process all records but only send feeds to Magnify in the batch size specified, thereby sending data in increments.
- The remaining Engine objects were covered in the Movies tutorial.
- Review the Set object.
Note: You must set the ASNAMES setting to MIXED in order to preserve case-sensitivity.
- Open the Define object.
- Review each Define field.
- Click Cancel.
- Open the Report object.
Note: The following steps give you hands-on experience in recreating this procedure by starting fresh. This step can be skipped in order to follow along, similar to the hands-off approach in the Movies tutorial.
- In the Report Painter canvas, delete all the fields by selecting all of them or using Ctrl+A and then pressing Delete.
- Build the Format
Magnify Report.
- In the Object Inspector, double-click on the field CAR and the field COUNTRY.
- In the Report Painter canvas, while holding Shift, select both the COUNTRY and CAR columns.
- On the toolbar, click By.
- In the Report Painter canvas, click to the right of CAR to begin adding more columns to the report.
- On the toolbar, click Detail.

- In the Object Inspector,
add the remaining columns. These are listed in the following table.
After the column is added to the Report canvas, right-click on the
column and select Column Title.

- Add Fields and Column
Titles for the following:
Column
Column Title
Purpose
SEARCHTITLE
SearchTitle
Format Magnify Reserved Alias Name (Case Matters)
SEARCHID
MagnifyID
Format Magnify Reserved Alias Name (Case Matters)
COUNTRY
C1_Country
Category
BODYTYPE
M3A_Body_Type
Multiple Category
MODEL
M4A_Model
Multiple Category
WARRANTY
M6A_Warranty
Multiple Category
STANDARD
M5A_Features
Multiple Category
MPGRANGE
M7A_MPG_Rating
Multiple Category
COUNTRY
S_Country
Searchable Content
CAR
S_Car
Searchable Content
MODEL
SA_Model
Aggregated Searchable Content
BODYTYPE
SA_BODYTYPE
Aggregated Searchable Content
WARRANTY
SA_WARRANTY
Aggregated Searchable Content
STANDARD
SA_STANDARD
Aggregated Searchable Content
SEARCHID
WF_INDEX_UNIQUE_KEY
Magnify Meta Tag
TITLE_URL
<not needed>
Magnify Meta Tag
LINK_URL1
<not needed>
Magnify Meta Tag
LINK_DISPLAY_NAME1
<not needed>
Magnify Meta Tag
S_HARDCODED
<not needed>
Searchable content (last because it is a TX field type)
For more information on using Magnify meta tags and Format Magnify reserved names, see the Magnify Developer's Guide.
- In the Object Inspector,
add the remaining columns. These are listed in the following table.
After the column is added to the Report canvas, right-click on the
column and select Column Title.
- Click Save and
then Run.
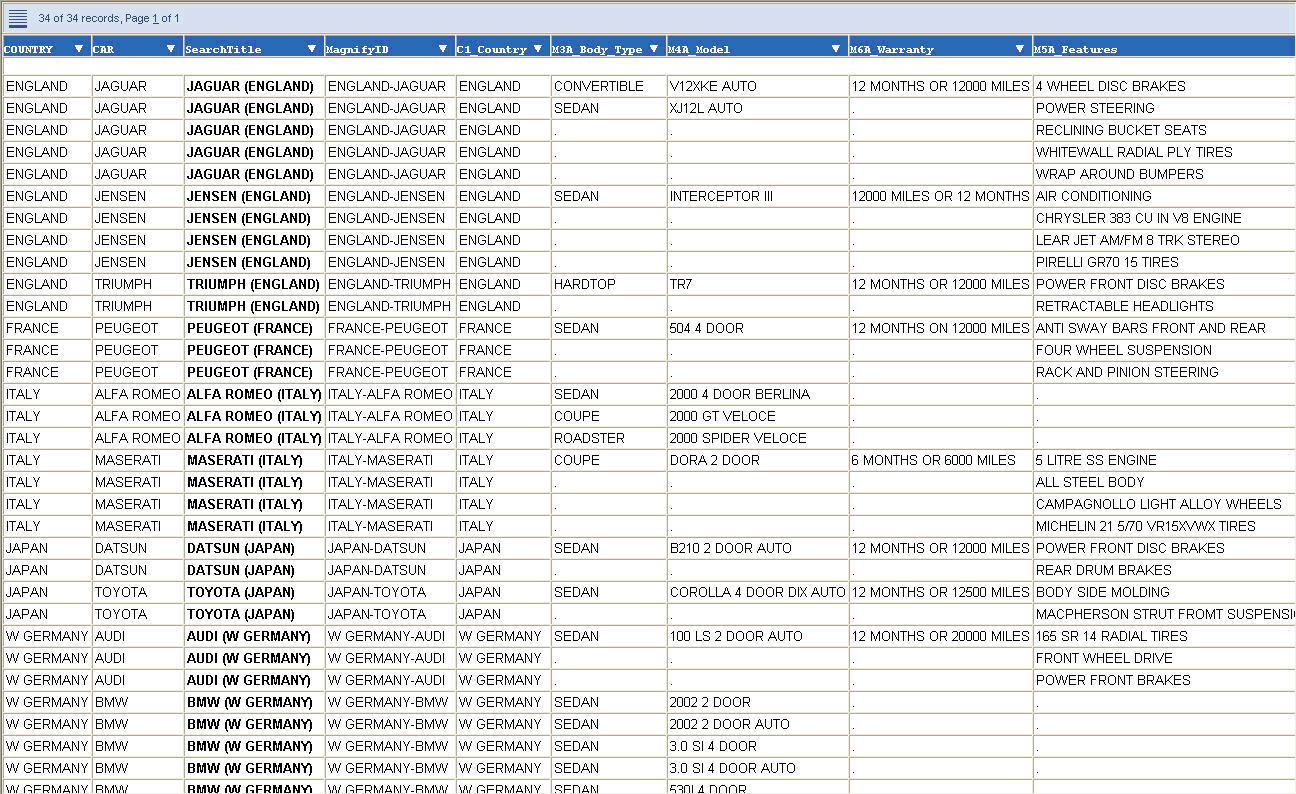
Note: Each Car will include multiple rows as part of its single search result, thereby searching either the Jaguar V12XKE Auto or XJ12L Auto will return the aggregated Jaguar search result.
- Close the Developer Studio Viewer and return to Report Painter.
- Change the Output
Format as follows:
- Click Options.
- From the Output Format drop-down list, expand Unstyled Formats and select Format Magnify (MAGNIFY).
- Click Apply and then OK.
- Click Save and then Run.
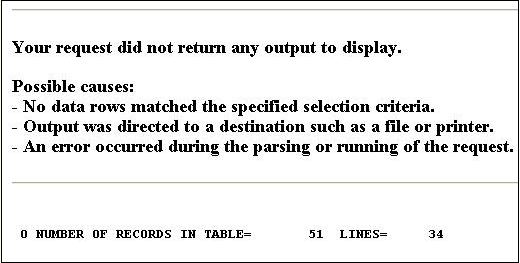
- Confirm that there are no errors. Note that upon execution,
the Reporting Server will process the request by transforming the
report output into the Magnify feed protocol.
Note: If you receive an error, see Magnify Error Handling in the Magnify Developer's Guide.
Note that not every row is sent to Magnify. Fifty-one rows are aggregated into 34. As part of the Magnify output, the 34 records are further aggregated into 10 search results.
- Close the Developer Studio Viewer.
- Close Report Painter.
- Close the Procedure Viewer window.
- Open an Internet browser.
- Navigate to the Magnify
search page:
http://host:port/wfcontext_root/search
where:
- host:port
Is the machine name and port number where WebFOCUS is installed.
- wfcontext_root
Is the WebFOCUS application root.
Note: Sample or default URLs are for informational purposes only and may not resolve correctly, if at all.
To return to the Magnify interface, the default URL is:
http://localhost:8080/ibi_apps/search
- Perform a search
test by entering cars in the Search box and clicking Search.
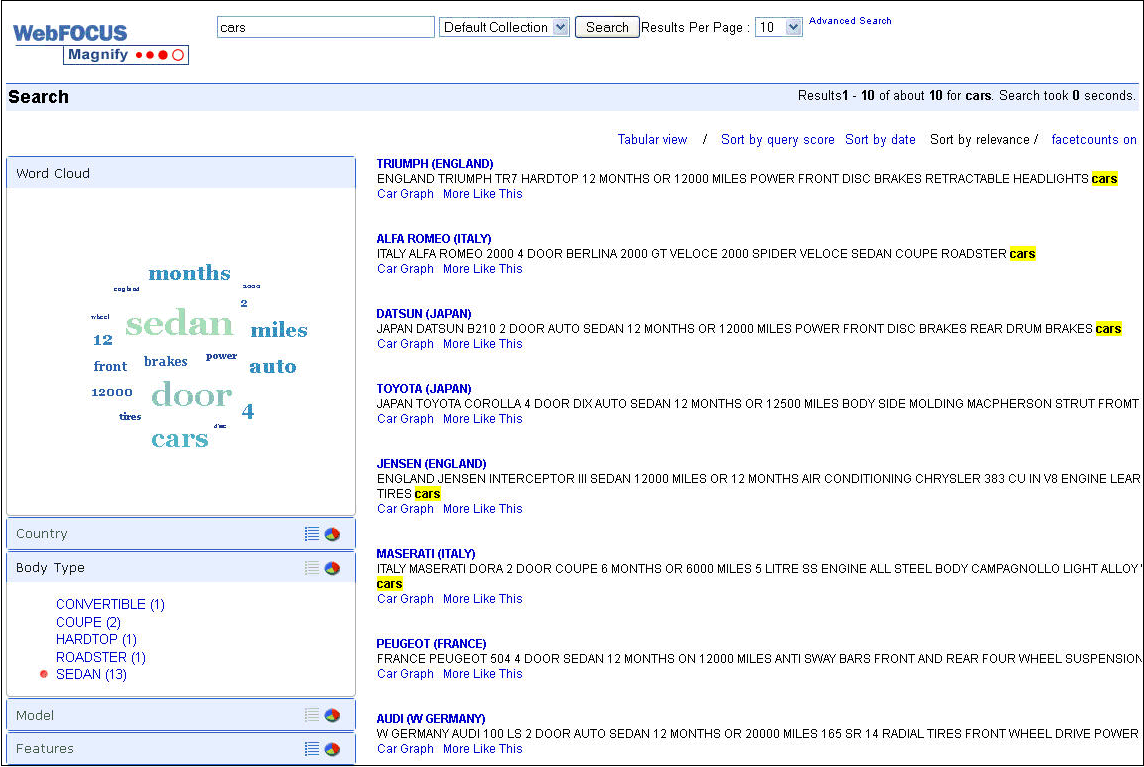
- Review the results returned and search to identify how the data has been applied to the Magnify search interface.
- Close the browser window.
- Close Developer Studio.