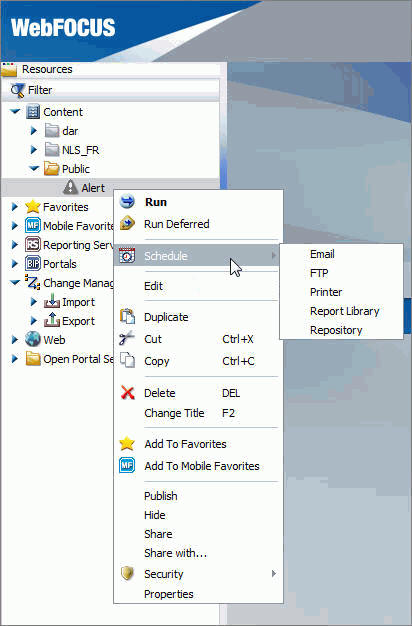
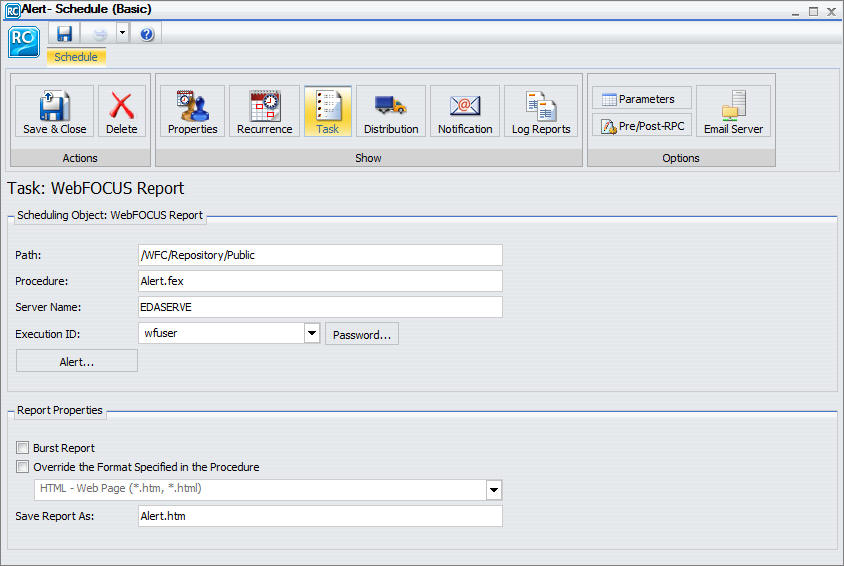
The ReportCaster Basic Scheduling tool opens in a new browser window, as shown in the following image.
For more information on the Basic Scheduling tool and distribution options, see the ReportCaster manual.
The Alert Options dialog box opens, as shown in the following image.
- Automatically Reset. This option continues to run the schedule at the specified time and checks to confirm that the Alert test is no longer true before the Alert test is evaluated again. It is best to use this option when you do not want to receive the Alert result again until after the exception condition has been addressed and occurs again. For example, when the quantity in inventory is greater than 20,000, the Alert is triggered. You do not want to receive the report again until after the inventory is less than or equal to 20,000 for all products and then goes back over 20,000 again.
- Continue After Alert. This option continues to run the schedule at the specified time and distribute the report each time that the Alert test is true. It is best to use this option when you want to be notified at the interval specified in the schedule that the Alert test is true.
- Deactivate Schedule After Alert. This option deactivates the schedule after the Alert is triggered. The schedule has to be activated again for the Alert test to run after the Alert is triggered. It is best to use this option for one-time Alert tests. This is the default value.
- Delay. This option is best used when you want to allow a specific period of time to address the Alert test but want to be notified again if the Alert test has not been met. You can restart the Alert after a maximum of 99 hours, days, weeks, months, or years.
As you complete the creation of the schedule, remember to consider the burst option to distribute specific report values, instead of the entire report. When a report is burst, the distribution information must be provided in a distribution list, distribution file, or dynamic list for email distribution and an access list for library distribution. The email and library distribution options are the most effective for Alert reports because of the push versus pull notification through email. For more information on using the burst option in ReportCaster, see the ReportCaster manual.
For more information on Recurrence options, see the ReportCaster manual.
The schedule report now appears in the Resource tree, as shown in the following image.