The Date Parser can be used to generate new date/time fields for a dataset without having to manually edit the data source. New date/time fields are created in the project using one of 29 format options, based on data values from an existing field with a DateTime data type.
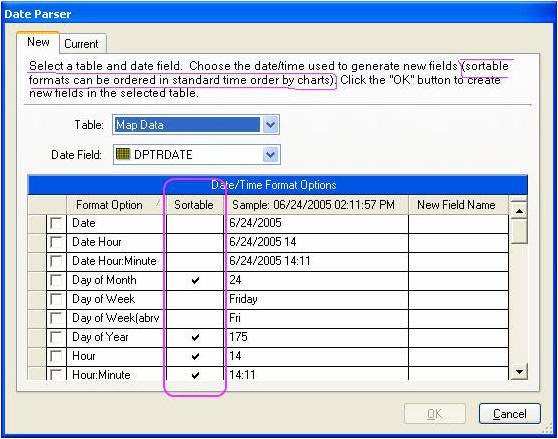
The Date Parser can be very useful for generating rollups (for example, week, quarter, month, year) from a detailed date format. However, be aware that the result data type is (currently) a String, not a Date, so use a format that will sort properly and be aware that some charts that accept dates do not accept string (for example, Time Table x-axis). The formats that will sort properly are marked with a check in the Sortable column.
To access the Date Parser, select Date Parser from the Tools
menu or click the Date Parser button  in the Project Workshop toolbar.
Select a table from the Table drop-down list.Select a DateTime field
from the drop-down list. Only fields with the DateTime data type
will appear in this list.
in the Project Workshop toolbar.
Select a table from the Table drop-down list.Select a DateTime field
from the drop-down list. Only fields with the DateTime data type
will appear in this list.
In the Date/Time Field Options grid, select the check box for the applicable format option that will be used to generate the new date/time field. Once you select a format, the New Field Name column displays a default field name. You can edit this name as desired by clicking on the New Field Name cell and editing the existing name or typing in a new name.
Note: You can select multiple date/time field options. If the data values in the source DateTime field do not contain the necessary information, the generated field will contain empty data values (zeros). For example, if you selected the Hour:Minute format option and the source DateTime field does not contain time values, the new Hour:Minute field will be displayed 00:00 data values.
Click Apply to add new fields to the selected table in the data pool.
| WebFOCUS |